≡ Menu

Stamping Background and Patterned Paper

Are you ready to get creative with stamps? Let’s make your own background or patterned papers! It’s EASY!

Watch this short video to learn these tips and tricks so you can create your own gorgeous background and patterned papers too!

First… let’s talk PERFECTION.

There is no such thing as perfection in stamping. If you can’t live with that… BUY your patterned papers!

I’m not just saying this to be funny.

Stamping is full of imperfections and little things that just don’t turn out as planned. If those kinds of things will drive you crazy, why would you do that to yourself?

If you can find the beauty in the flaws then you’ll survive a bit of stamping fun!

TRICK… Foam is your friend!

To get nice, crisp stamped images put a layer of foam under the paper you are stamping onto. This will help you have even pressure on your stamp and will result in fewer holes and gaps in the finished stamped image. Yay!

Tip… Big guys first.

If you are stamping images of various sizes start with the largest and leave the smaller ones for last. This way you can fill in any awkward spaces with the small stamps. Sneaky, right?

Over the Edge… it’s a good thing!

For a more natural look stamp some of your images right off the edge of the paper. BUT… be sure to re-ink your stamps well before you use them again. (or you’ll end up with awkward lines >>> insert panty line joke here <<< (or just pretend I did!) 😉

2 is better than 1

Like most things in life 2 really is better than one. Some of my favourite stamp sets have two stamps that work in stages or layers. This is called two-step stamping and it helps to give you greater variety and options for creativity… if you see two-step stamps, grab ’em!

It’s playtime!

The best advice I can give you is to play and experiment with your stamps. The more you stamp the more comfortable you will be using them. Unleash your creative potential by playing with your stamps!
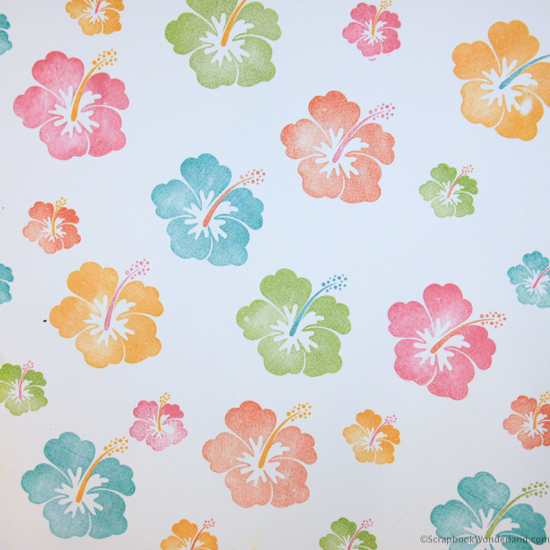
stamping background patterned paper hibiscus

Still Need Perfection?

Maybe theres IS a way to find perfection in stamping! Have you ever wanted to try this digitally? You’re in luck because my friend Karen from Photos Kept Alive has a tutorial showing you how to create patterned ‘stamped’ papers using Panstoria Artisan.  CLICK HERE TO CHECK IT OUT.


Do you have a great tip for stamping? Share it in the comments!

Let your creativity shine!

Alice.
Alice Digital Signature 2013


{ 8 comments }

The Challenge is ON!

Happy International Scrapbooking Day!

I have a challenge for you.

Come join me and the ScrapGals in a day of scrappy challenges and fun.

I will update this post as I play along today.

International scrapbooking day with the Scrap Gals promo

Click this image to join in!


Challenge #1.

Tiffany and Tracie started the day with their challenge. They had invited the ScrapGals community to suggest ideas for a layout challenge. Then they drew 3 ideas and incorporated them into a layout!

Here’s the challenges:

  1. Use cream and less cream. (You know how there are many shades of cream… today you will combine them!)
  2. Use a quote from an 80’s movie or song.
  3. Use three different colours of mist or paint.

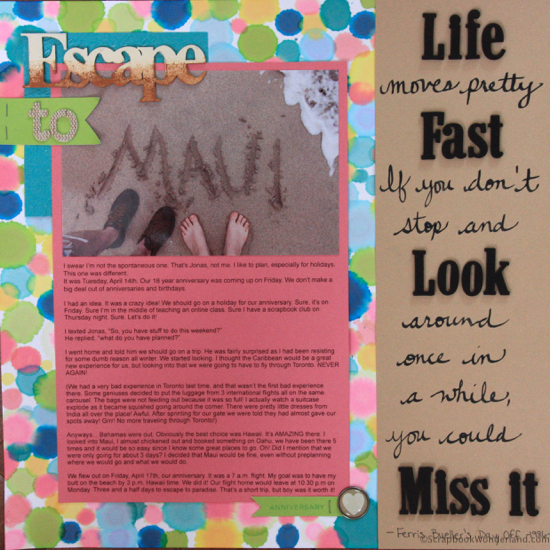
Here’s the layout I made for this challenge!

Escape to Maui layout image

I made the background paper earlier this week using diluted re-inker with an eye dropper. There is some cream and less cream… this was the hardest part! I also used a quote from one of my favourite 80’s movies, Ferris Bueller’s Day Off.

Challenge #2

Jen Schow gave us the next challenge. We needed to use our 6×6 paper packs to create a layout!

Here’s a link to her video demo: Designing with 6×6 papers VIDEO

This is the layout Jen creates in the video:

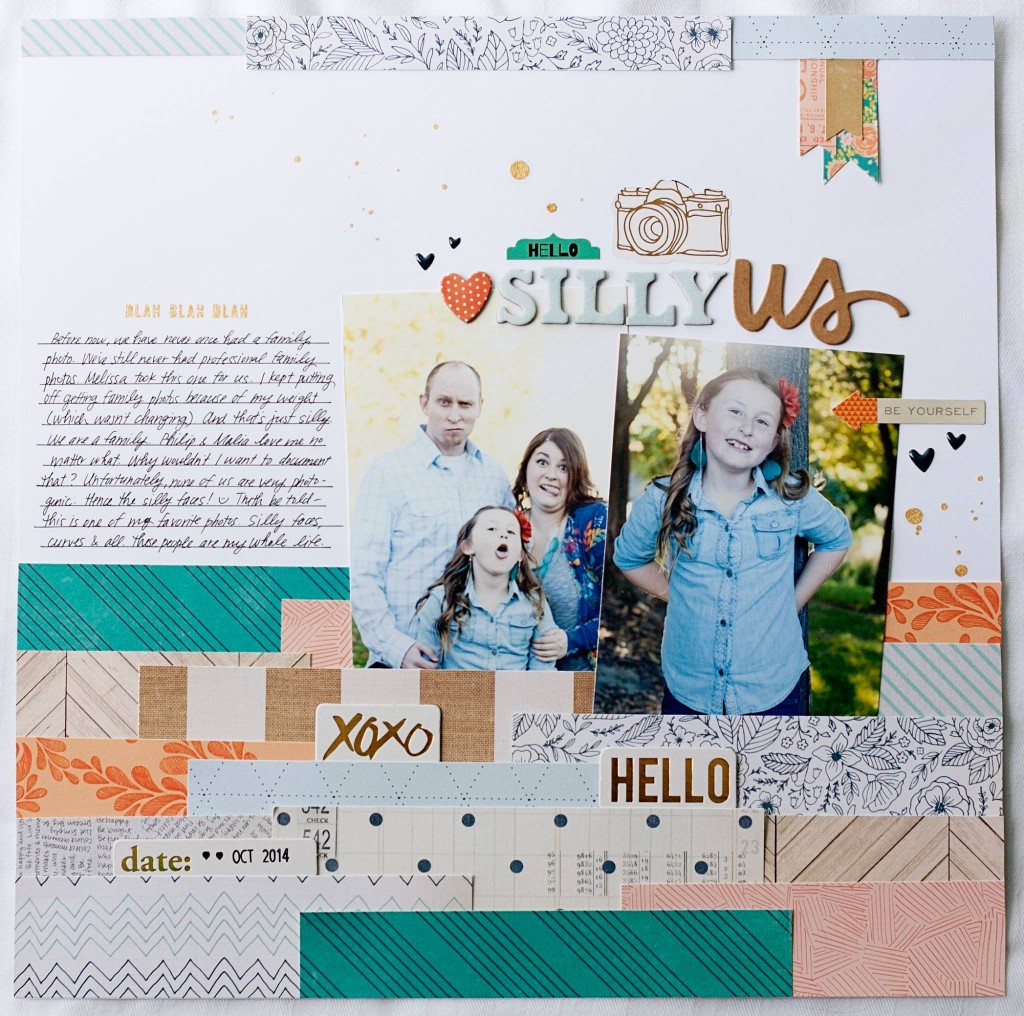
Jennifer Schow silly us layout

Layout by Jen Schow. Click to watch her video!

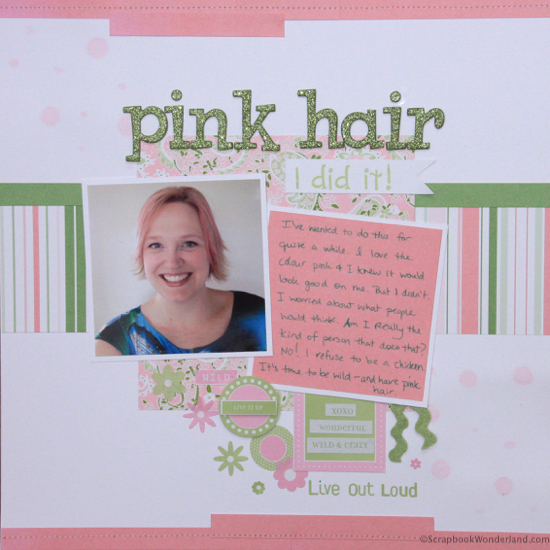
Here’s the layout I created using 6×6 papers and featuring my new pink hair. I found a kit from an old class I had taken… um… many years ago… that had two 6×6 paper packs. They are Making Memories brand, which has been gone for a long time. Isn’t it great that we can take old product and make it look brand new?

I based this layout design on one of Jen’s from her 6×6 paper pack love video series. Her layout was called Sodalicious. One of the coolest things is that I sewed! It’s been a long time since I’ve sewed on a layout and it was so easy and I love the look of it. Why don’t I do it more?

pink hair layout image

Challenge #3

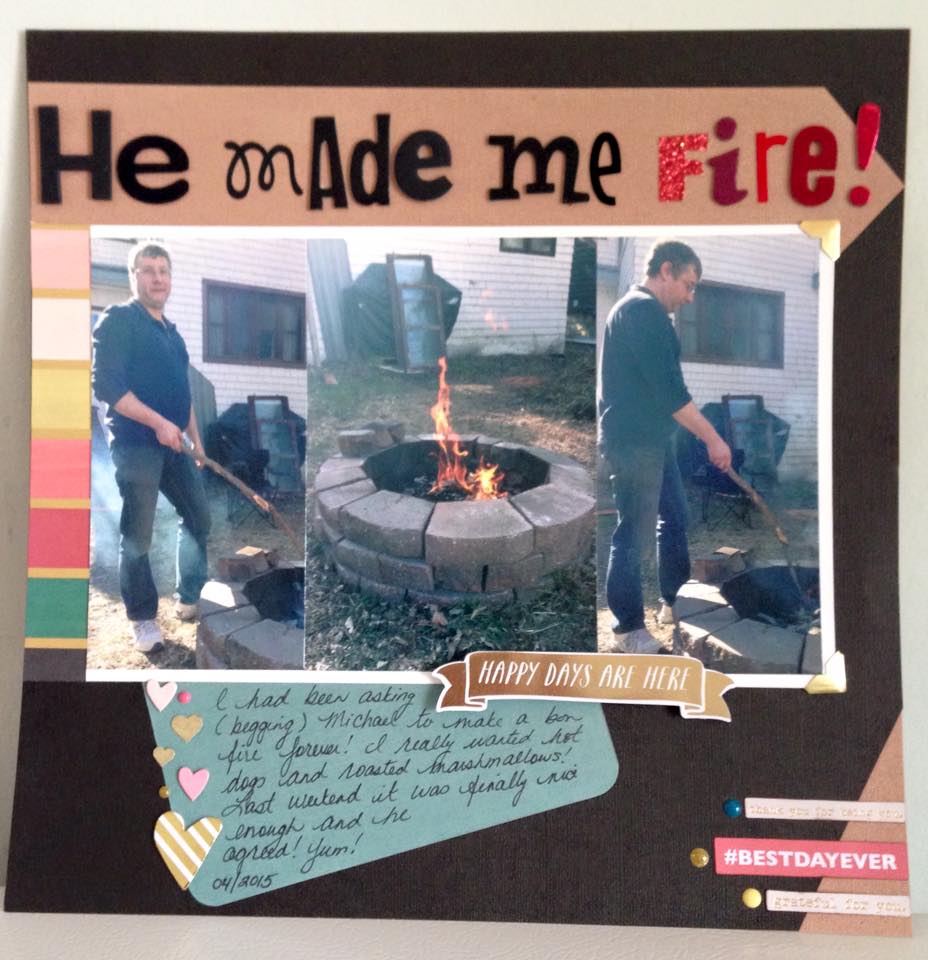
Ellen Thompson might just have given me my biggest challenge yet! Her challenge is to mix alpha letters/font on a layout or card. Here’s her examples:

Ellen Thompson he made me fire layout


Challenge #4

MY TURN! I CHALLENGE YOU!

Your challenge is to create your own background or patterned paper. But don’t worry! I won’t leave you hanging! I have a ton of super-cool crafty ideas to get you playing and creating! Watch this video to get you started:

Of course, after you create your paper you’ll want to make a layout!


Now it’s your turn!

Come play along, there’s more fun to come!

Now, go and be crafty!

Alice.

{ 2 comments }

I Challenge You!

Tomorrow, scrapbookers around the world will be participating in events for International Scrapbooking Day!
I challenge YOU to come join the fun!
International scrapbooking day with the Scrap Gals promo

I’ve teamed up with Tiffany and Tracie from the ScrapGals podcast for a day of fun challenges and inspiration.

Starting at 9 am Central time, a new challenge will be posted in the ScrapGals online community every two hours. You can play along, totally for free, and share your love for scrapbooking.
Visit http://facebook.com/groups/scrapgals and join the online community to get in on the fun!
(P.S. My challenge will be released at 3 pm Central time!)
Hope to see you there! Now, go and be crafty!
Alice.
P.P.S. Not on Facebook? I’ll be sharing my portion of the challenge here, so check back at 3pm Central.
{ 0 comments }

3 Mother’s Day Cards

Create stunning Mother's Day cards with these three examples and a VIDEO too!

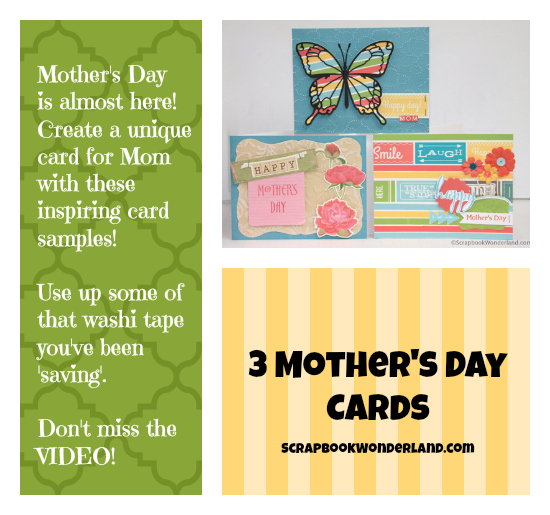
Mother’s Day is almost here. Do you use your scrapbooking supplies to make cards for Mother’s Day? These 3 gorgeous Mother’s Day cards are here to inspire you to pull out your supplies! Don’t miss the VIDEO for the third card too!

Make it Monday Pink CircleMake it Monday

Are you hopping along the Make it Monday blog hop? You’ll have arrived from Jen Wright Designs where Jen is sharing a free template “All About Her” to celebrate Mothers Day! I’ll share your next stop on the hop at the end of this post.

Mother’s Day Cards

I have 3 gorgeous Mother’s Day cards that are sure to inspire your creativity so you can create a card for a mom in your life. Don’t miss the VIDEO for card number 3!

Show 3 cards

Butterfly Card

mother's day card 1

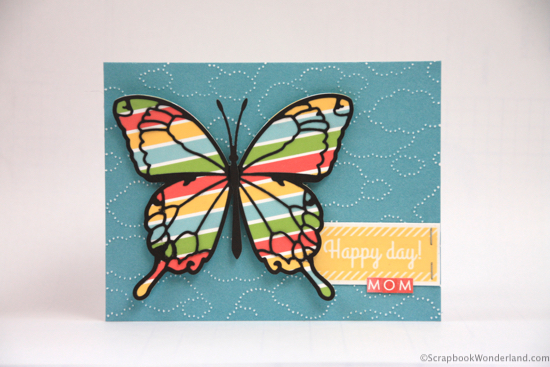
I’m in love with this butterfly die! There’s so many ways to make this butterfly look unique and I think it’s just so beautiful. When I remembered I had the cloud embossing template I was thrilled… a perfect pairing!

Details:

  • The base of this card was embossed with a Sizzix embossing folder. I lightly sanded the clouds to reveal the white core of the paper.
  • The tag that says, “Happy day!” is washi tape, from Close to My Heart, mounted on white paper. It is glued and attached with mini staples. (I’m loving my mini stapler… why are little things so cute?) 😉
  • The “Mom” sticker letters are from Webster’s Pages.
  • The butterfly was created by putting washi tape onto white paper in strips, then running that paper through the die cut machine using a Memory Box die. Then the black layer was cut using a co-ordinating die. I curled the edges with my fingers and applied it to the card with foam tape.

Floral Card

mother's day card 2

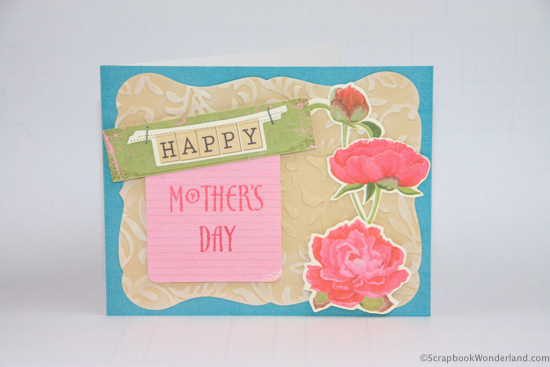
This card is simple and elegant. Oh, and did I mention easy?

Details:

  • The flowers, tags and ‘happy’ are from a die cut pack. I’d love to tell you which one, but it looks like something exploded in my scrap room!
  • I used my mini stapler to attach the ‘happy’ to the green tag. 🙂
  • “Mother’s Day” is stamped using a CTMH stamp set and ink.
  • The “Debutante Frame” (that ‘s what’s called) is a die cut from Memory Box. I embossed it with a Provocraft embossing folder, and rubbed some colonial white ink from CTMH onto some of the raised areas.

Washi Tape card

mother's day card 3

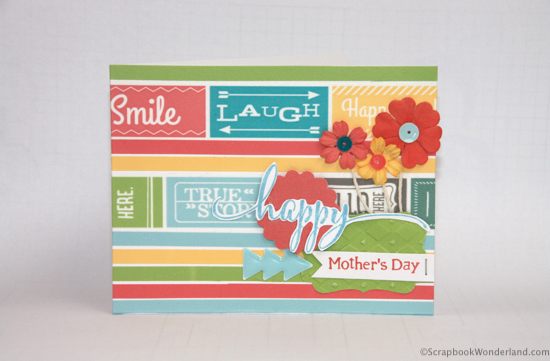
This card is so much fun! If you love washi tape, especially if you happen to have a little ‘collection’ of it, you’ll want to make cards like this for sure! (We’re not calling it hoarding… why would we do that?) 😉

Details:

Really, you’ll see all of the details if you watch the video, but I’m happy to share more details here too!

  • The base of the card was made using strips of washi tape from CTMH.
  • The stamps are also from CTMH. Actually most of the supplies are!
  • The green shape is a punch from Stampin’ Up and was embossed with a Sizzix embossing folder. The pink scalloped shape was made with a punch from Fiskars.
  • The paper flowers were sprayed with ink to match the washi tape. The centers are sequins… love them!
  • Of course, I used the mini  stapler to attach the “Mother’s Day” banner. 🙂

Make it Monday Pink CircleMake it Monday

Your next stop on the Make it Monday blog hop will take you to Clicky Chick Creates where Connie will show you how to create a one-layer Mother’s Day card! Yes, it is possible! Perfect for mailing, gorgeous to share!

International Scrapbooking Day

This Saturday is National Scrapbooking Day. To kick off some fun and excitement I’ll be participating in some exciting challenges hosted by The ScrapGals!

I’m going to rev up the fun by presenting one of the challenges! I can’t wait!!!

Join the ScrapGals Facebook group today so you’ll be ready for Saturday’s adventures! Click HERE.

International scrapbooking day with the Scrap Gals promo

Okay! There’s so much excitement here today! I hope you’ll check out the links and I’d LOVE to see YOUR Mother’s Day creations! Share a link in the comments or pop over to the ScrapbookWonderland Facebook page and post a pic!

Let your creativity shine!

Alice.
Alice Digital Signature 2013
{ 3 comments }

Tutorial: Masking With Stamps

If you are new to stamping there are a lot of fun techniques that you’ll be excited to learn. In this post I will show you how to layer your stamps using masking to create fun and creative projects.

Make it Monday Pink CircleMake it Monday

If you are following the Make it Monday blog circle you’ll have arrived from Jen’s weekly scrapbooking challenge. Join the fun with her free template! She also has a new Facebook group to share and be inspired. Jen Wright Designs I’ll share the next stop on the hop at the end of this post.

Masking Tutorial

When I was creating my Spring Babies layout (you can see it HERE) I used a masking technique to stamp a group of baby chicks. (Fun fact: a group of baby chicks is called a clutch.)

In this project I’m using a foam and rubber stamp that has been in my stash for years. (Yes, I use old stuff. You can read more about that in THIS BLOG POST.) You can use rubber or acrylic stamps, either will work fine, although acrylic are easier to line up where you want them… because they are clear and you can see through them! 😉

Let’s get started with masking!

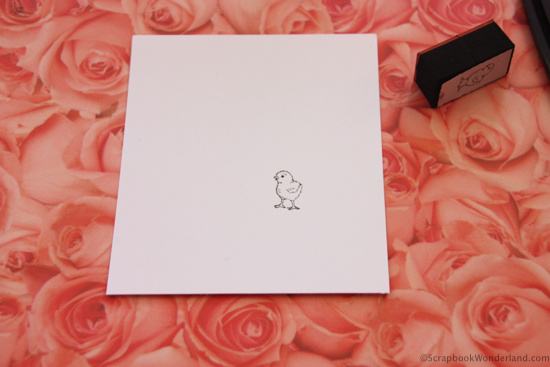
1. Stamp your first image.

masking with stamps tutorial image A

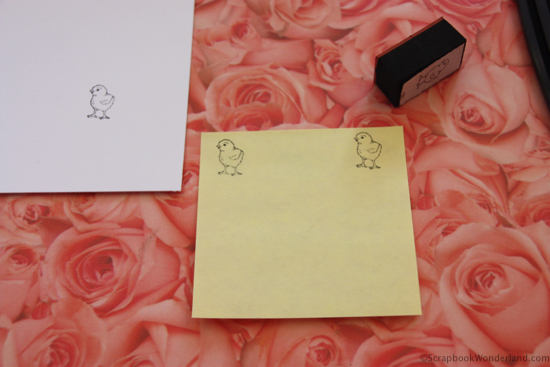
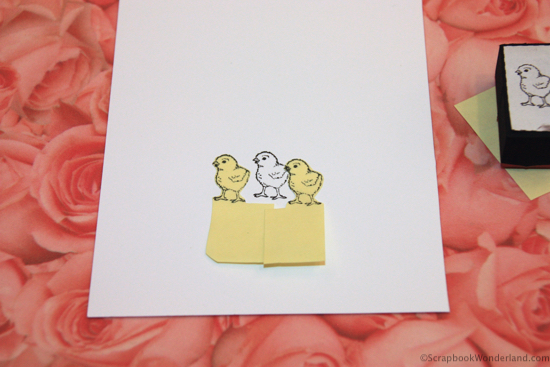
2. Create a mask by stamping the same image onto a sticky note. Sticky notes are perfect for this because they will temporarily hold in place as you stamp the next overlapping image.

masking with stamps tutorial image B

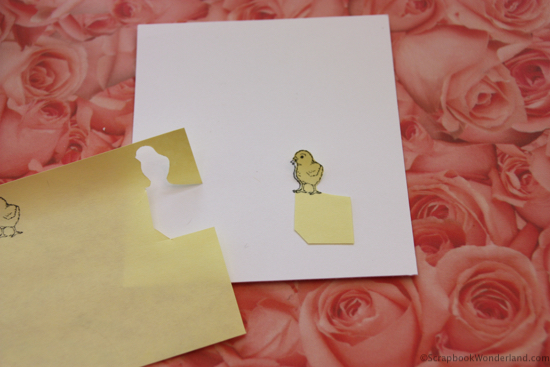
3. Cut out your mask and place it directly over the image you just stamped.

masking with stamps tutorial image C

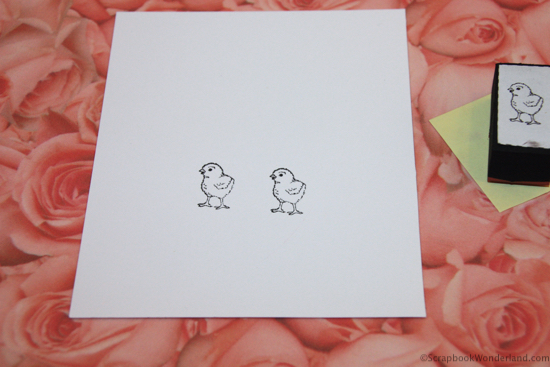
4. If you are creating an image that will be repeated multiple times, like the baby chick in this example, you should always stamp the images that will be in the front first.

TIP: Stamp the images that belong in the front first.

masking with stamps tutorial image 1

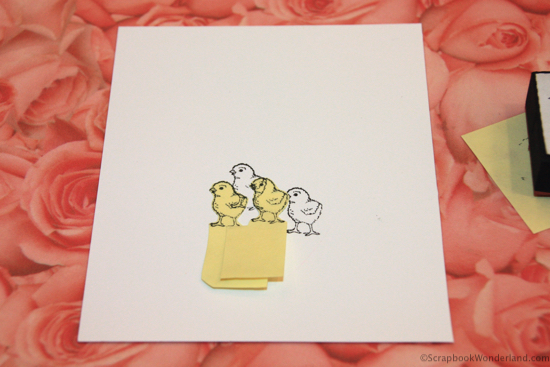
5. You may require more than one mask.

masking with stamps tutorial image 2

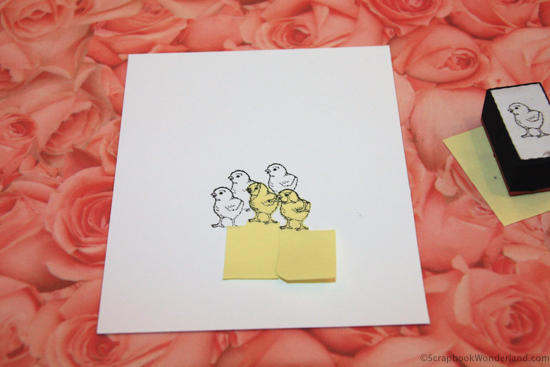
6. As you create your grouping, move the mask to completely cover a previously stamped image before stamping the next one. This is how you stamp all of the background images!

masking with stamps tutorial image 3

7. Continue moving the mask, or masks, and stamp the image onto your paper.

masking with stamps tutorial image 4

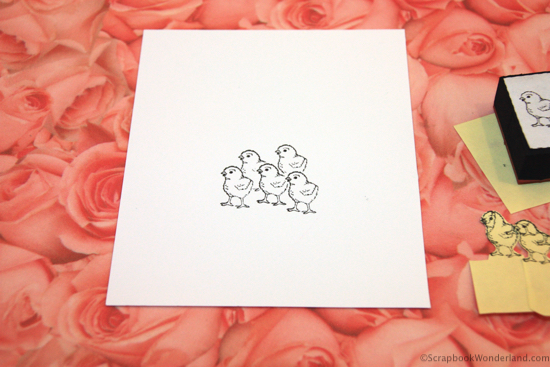
8. When you have completed, you will have a layered image created with a single stamp. 🙂

masking with stamps tutorial image 5

Fun with Stamps

At the beginning of this post I mentioned fun stamping techniques you’ll be desperate to learn… have you tried heat embossing? Heat embossing was THE reason I fell in love with stamping!

Make it Monday Pink Circle

Make it Monday

On your next stop on the Make it Monday blog circle you’ll see a little baby boy and a LOT of pink, in a Digital Scrapbooking HQ layout.

If you have a question about this technique I’m happy to help. Ask a question in the comments or on the Facebook page!

I’d love to see what you create use a masking technique with stamps! You can share a link in the comments or a photo on the Facebook page.

Let your creativity shine!

Alice.
Alice Digital Signature 2013
{ 0 comments }