≡ Menu

Quote, Unquote Class with Stephanie Ackerman

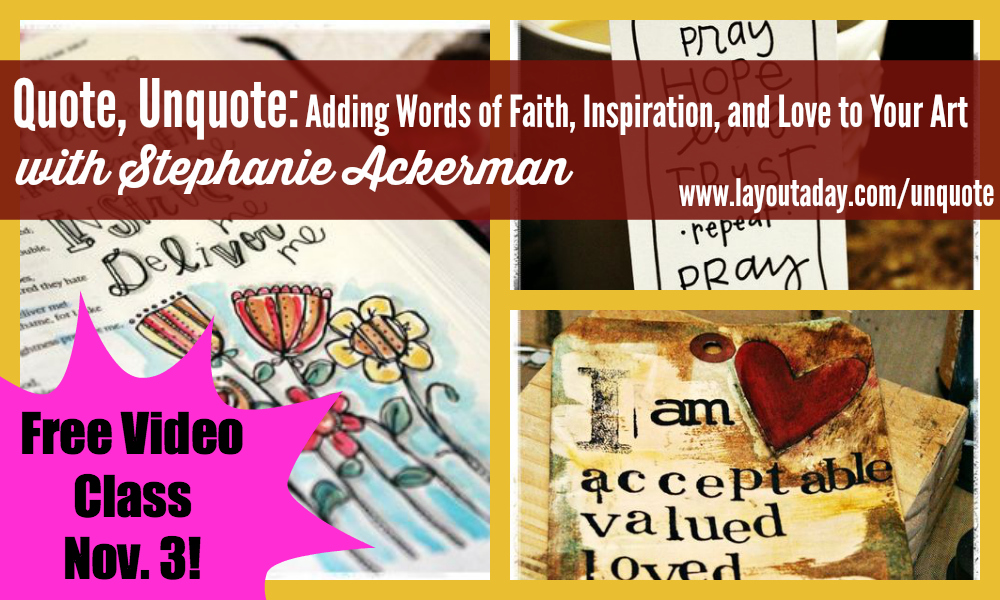
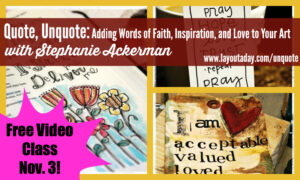
Quote Unquote class with Stephanie AckermanMark your calendar! On November 3 you can take part in this free video class with Stephanie Ackerman, Quote, Unquote: Adding Words of Faith, Inspiration, and Love to Your Art.

Click here to view more details

What will the class be like? Full of brilliant ideas, inspiration and Ah-ha moments, that is what you get in a Stephanie Ackerman class.

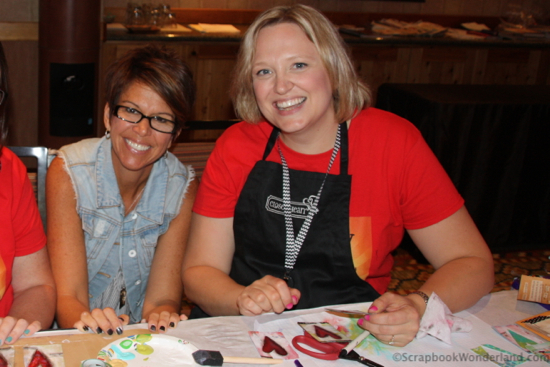
I know this as I had the pleasure to meet Stephanie this summer in Phoenix, AZ.

Stephanie Ackerman and me

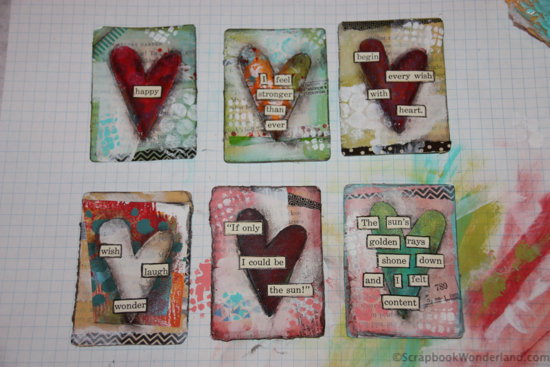
We made gorgeous HeART cards using fun and creative techniques.

Stephanie Ackerman heart card tutorial

I can’t wait to see what Stephanie will be presenting in this Free video class on Nov. 3.

Click here to learn more about Quote, Unquote.

Quote Unquote class with Stephanie Ackerman

What if you can’t make it on November 3rd?

Sign up! For a limited time there is a free replay! You’ll have a few days to watch the video for free. (After that you have to pay!) You can also re-watch it if you were there!

I’m so happy that I can share this amazing class with you. I hope you’ll be able to make it!

Alice.

Alice Digital Signature 2013


P.S. Don’t forget to sign up even if you CAN’T be there on the third! You can watch the replay for a limited time.

{ 0 comments }

Creative Title Lettering Technique {Heat Emboss}

Make creative scrapbook titles using heat embossing and more! Lots of good ideas!

No more boring titles!

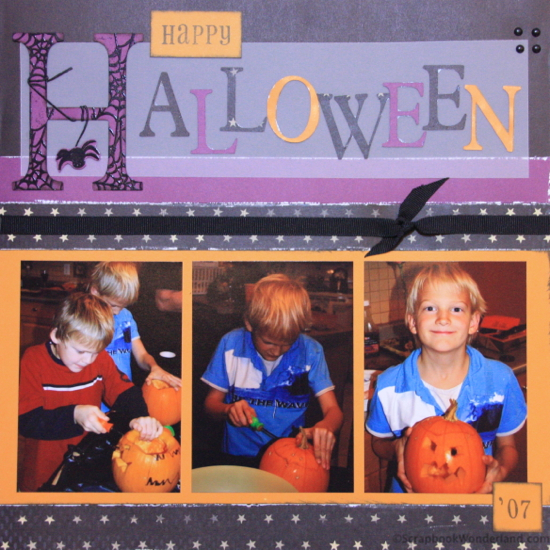
This creative title lettering technique will make the title on your Halloween layout extra spooky.

But don’t feel that this technique is just for Halloween.

You can use this technique for other themes and pages too!

make it monday blog hop image 2If you are following the Make it Monday Blog Hop you’ve arrived from DigitalScrapbooking HQ where Melissa was also scrapbooking Halloween. I’ll share the next stop on the hop at the end of this post.

Let’s face it, scrapbook titles are a necessary part of the page, but it’s easy to get stuck in a rut and keep doing the same thing over and over again.

Do all of your titles have Thickers? Maybe die-cuts? Stickers? Stamps? Whatever your title of choice is I’ll bet you use it a LOT!

We ALL do it!

Let’s take your scrapbook titles and give them a bit of a facelift by jazzing them up with heat embossing.

Make creative scrapbook titles using heat embossing and more! Lots of good ideas!

Cool tricks used on this title include:

  • Heat embossing on the first letter
  • Using more than one size of  letters (a much larger first letter)
  • Using multiple colours
  • Staggering the letters instead of keeping them in a straight line
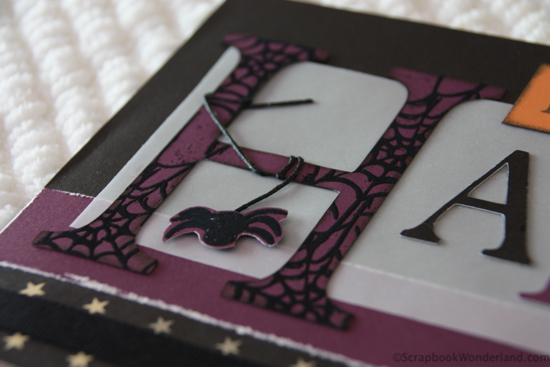
  • Wrapping waxy flax (a type of string) around the first letter
  • Adding a smaller word as part of the title (Happy)
Make creative scrapbook titles using heat embossing and more! Lots of good ideas!

4 Steps to Create the “H” in Halloween:

  1. Cut the “H” using a die cut machine. The “H” is 3.5″ tall and the rest of the letters are 1.5″ tall.
  2. Stamp a cobweb onto the “H” using a Versamark ink or a pigment ink.
  3. Apply black embossing powder and melt.
  4. Wrap the “H” with waxy flax string and hang a stamp embossed spider from the string.

Not sure about how to heat emboss or haven’t had a lot of success with it? Here’s a video I made that takes you through all of the steps and gives you my best practices and techniques so you’ll fall in love with heat embossing like I did!

I hope you’ll be inspired to get creative with your scrapbook titles! I’d LOVE to see an example of a creative title you’ve made. Please share them on the Scrapbook Wonderland Facebook Page.

On your next stop on the Make it Monday Blog Hop Jen Wright has a free pumpkin-themed template to make a quick and fun Halloween layout! HOP HERE.

If you are ready to fall in love with scrapbooking again and you want to make scrapbooks you love sign up for the Scrapbook Wonderland mailing list. Subscribe.

Let your creativity shine!

Alice.

Alice Digital Signature 2013


Make it Monday Blog Hop:

Scrapping Wonders

Messtaken Identity

Clicky Chick Creates

Photos Kept Alive

Kristie Sloan

Digital Scrapbooking HQ

Scrapbook Wonderland: YOU ARE HERE!

Jen Wright

{ 20 comments }

Pull Me Surprise Card

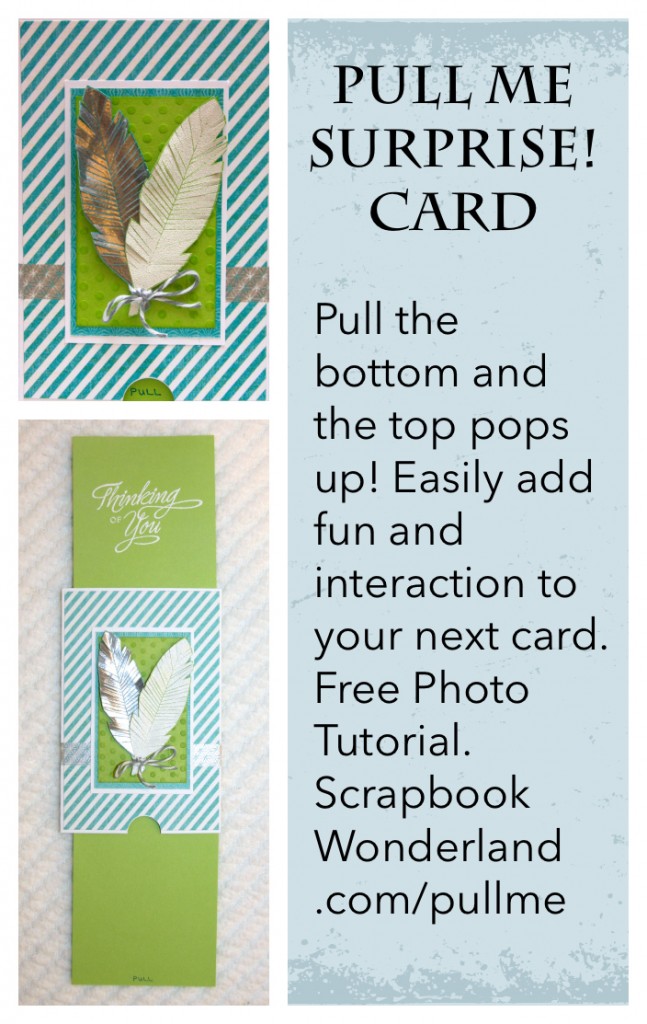
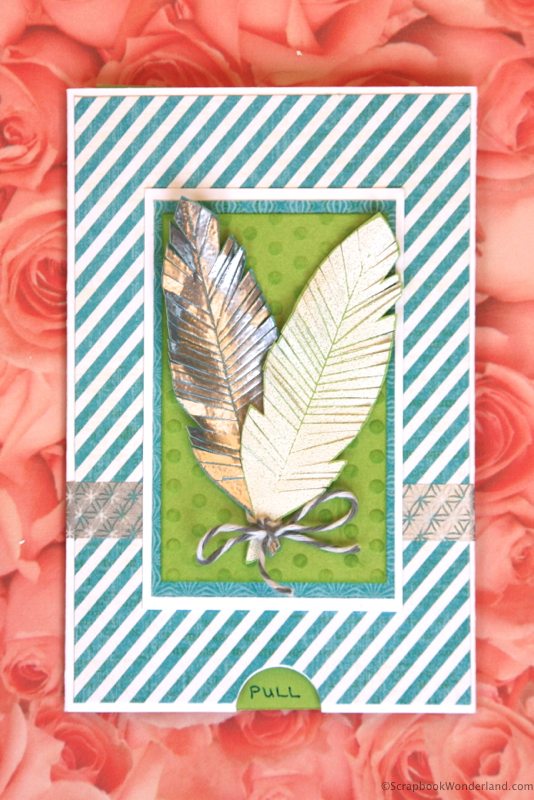
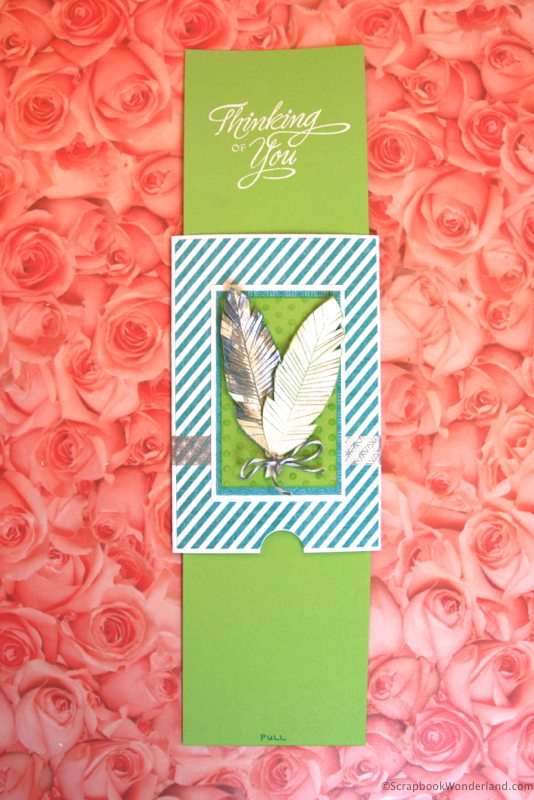
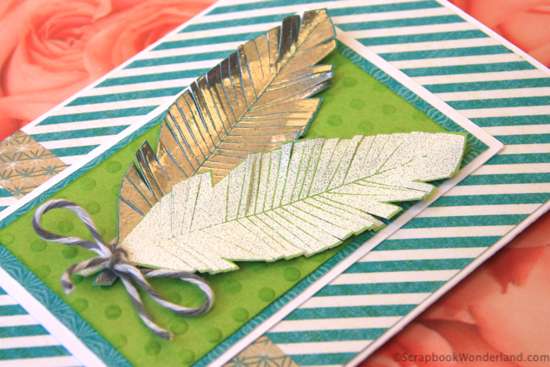
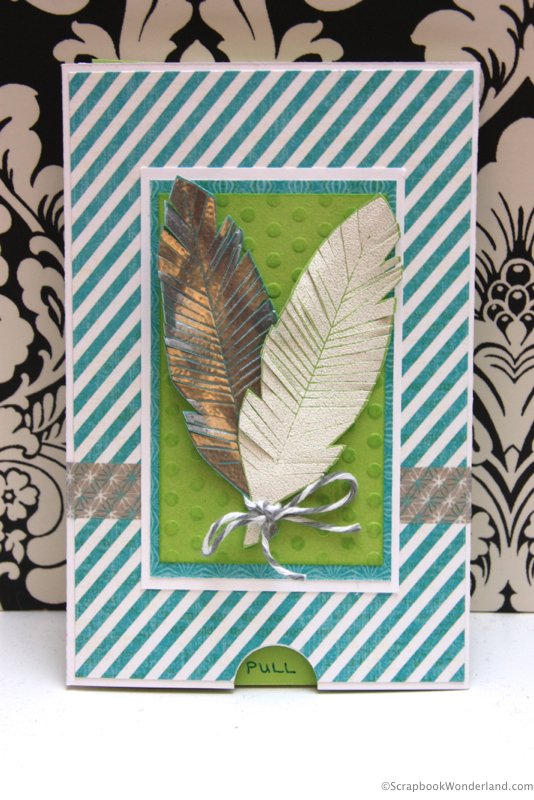
PULL me surprise card. This card is like magic! Pull the tab at the bottom and a piece pops up at the top too! PHOTO TUTORIAL on the site!If you are like me, you are going to love this technique for a fun and surprising card! I call it the PULL ME SURPRISE!

When you pull the tab at the bottom of the card not only does a hidden piece slide down but another piece pops out the top! Super-fun! 🙂

Let’s get started! (Don’t forget to bookmark this page so you can come back and make this card again.)

Supplies:

  • 1 Piece of Cardstock: 5-1/2 x 12″
  • 2 Pieces of Cardstock: 3-1/4 x 4-5/8″
  • Plastic bag
  • Adhesive: Sticky strip or other strong adhesive
  • Materials to decorate your card
  • NOTE: All supplies used in this sample are from Close to My Heart.

Directions:

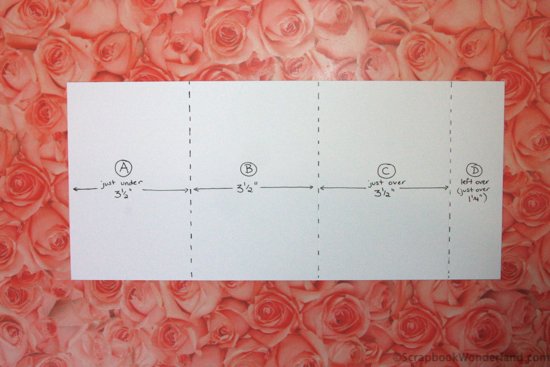
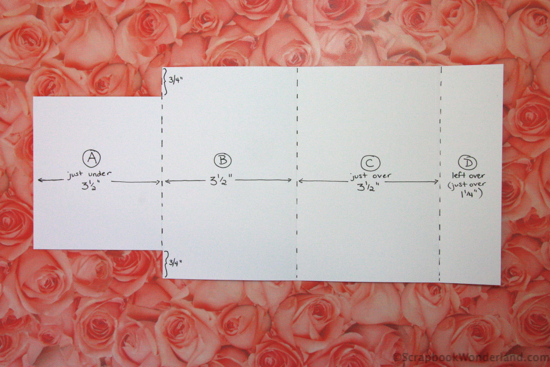
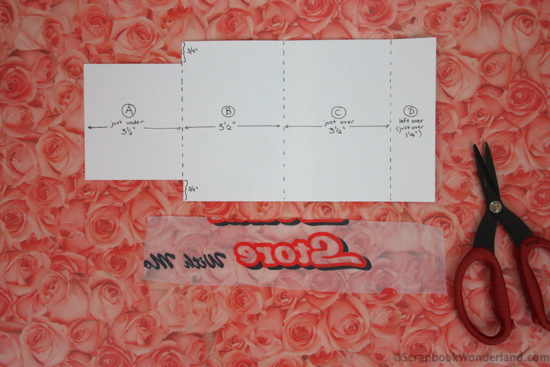
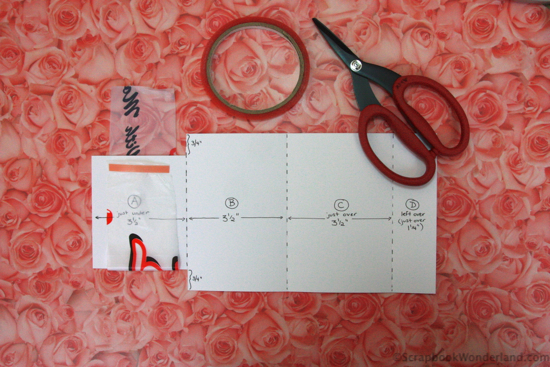
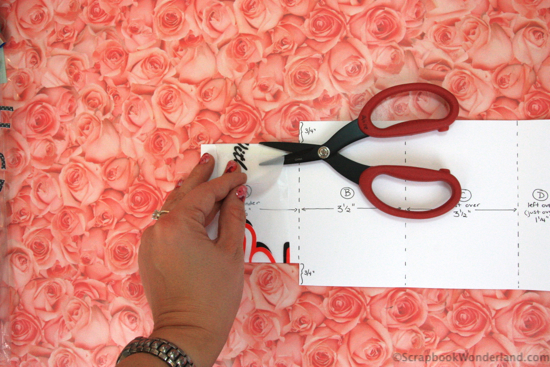
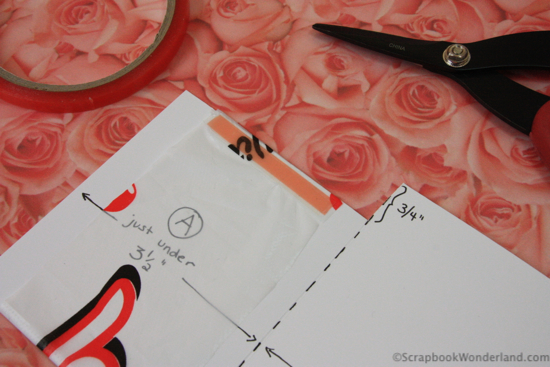
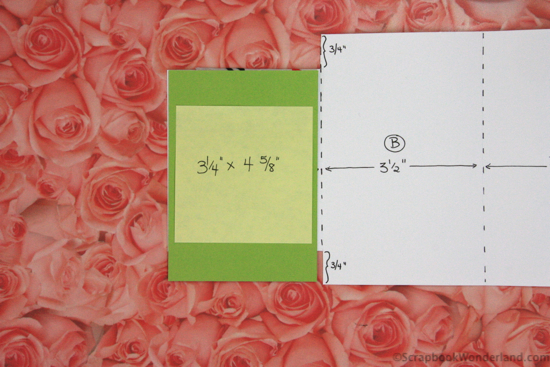
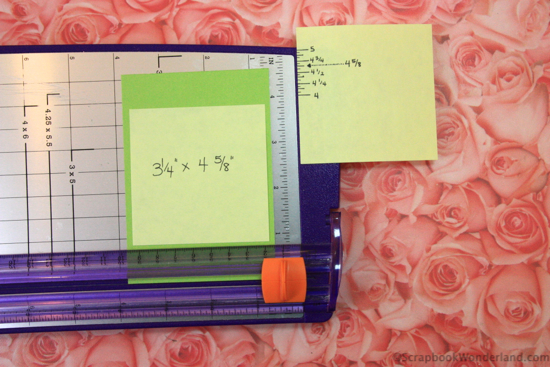
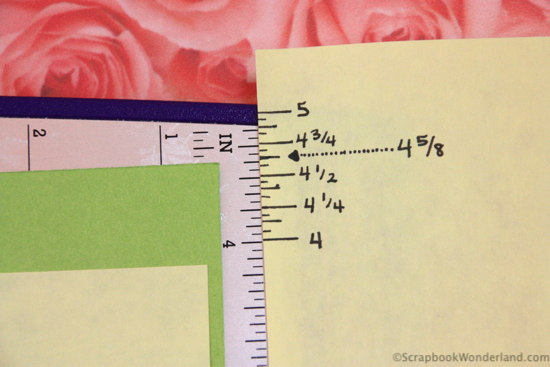
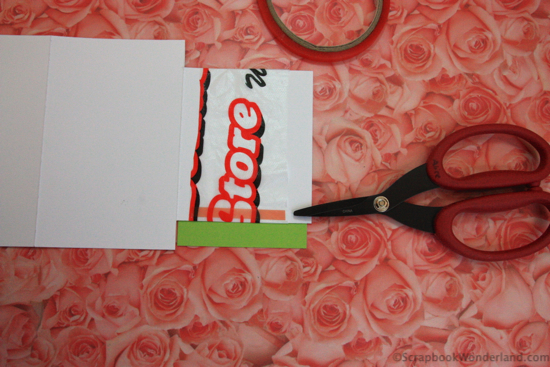
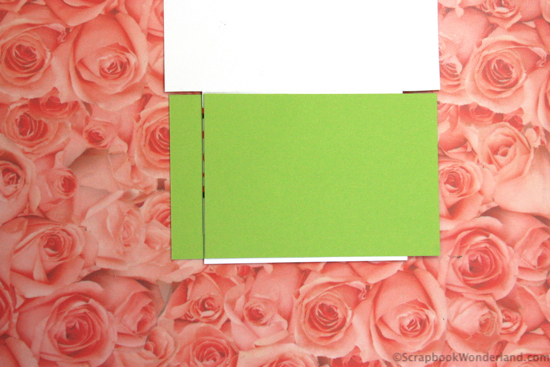
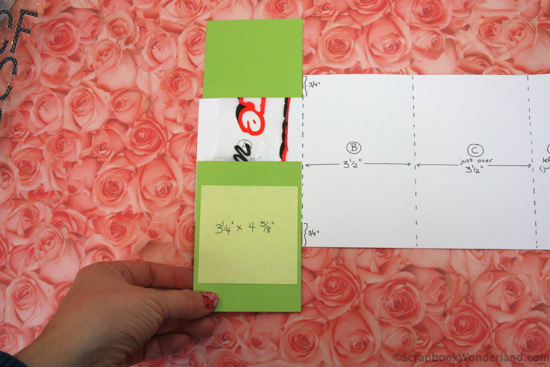
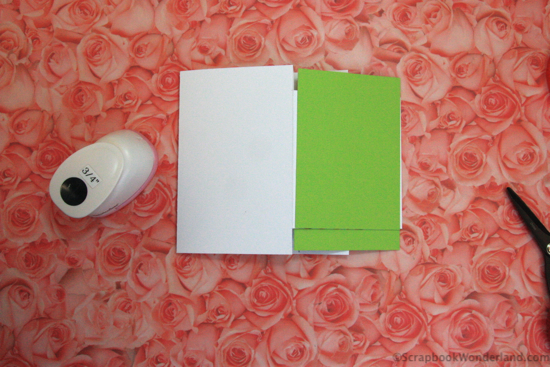
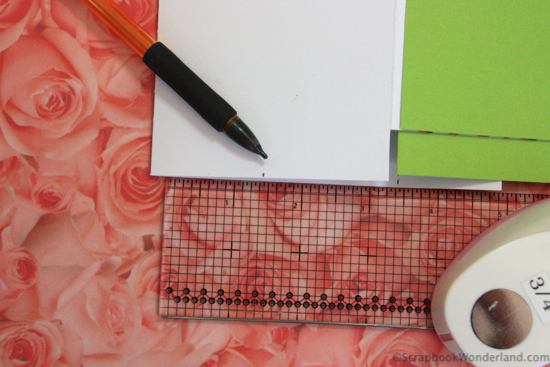
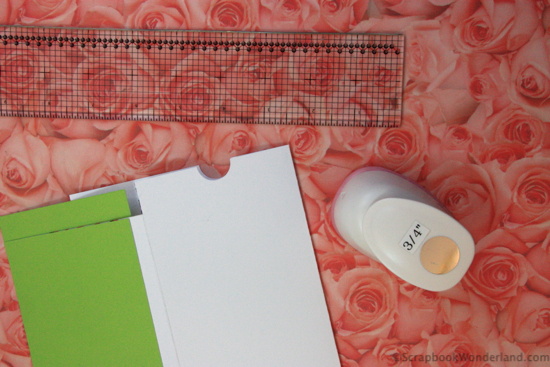
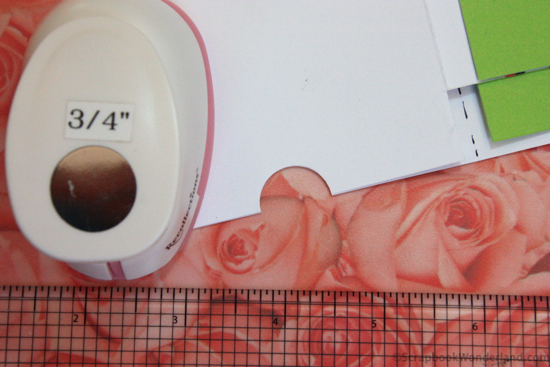
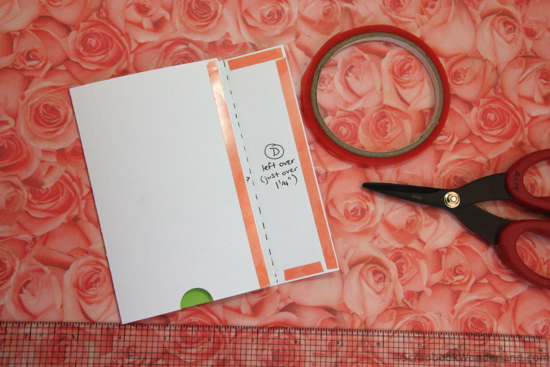
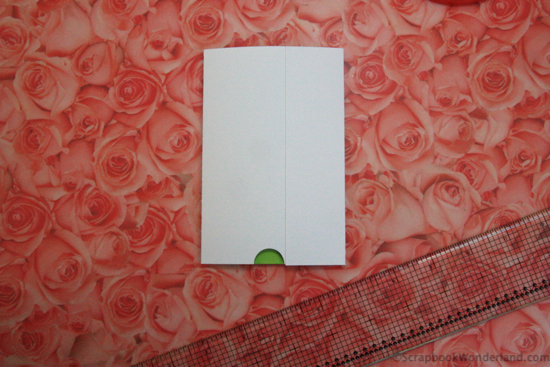
Score the 12″ piece of cardstock three times creating 4 sections A-D. A. Just under 3-1/2″ B. 3-1/2″ C. Just over 3-1/2″ D. You will have a section left at the end of just over 1 inch. Did you find yourself asking, “What’s ‘just under’ 3-1/2 inches mean? I generally use about 1/8” less, and more when making my score marks. Is that better? 😉 pull me card image 1 Cut 3/4″ off top and bottom of section A, just to the fold/score mark. pull me card image 2 Use bone folder to crease fold lines. Cut a strip of plastic bag approximately 2-1/2 inches wide by 9″ long. pull me card image 3 Wrap the strip of plastic bag around section A and glue the plastic to itself. Be careful not to stick glue on anything other than the plastic! pull me card image 4 Trim off the excess plastic. pull me card image 5 Place more adhesive over top of the adhesive holding the plastic together. pull me card image 6 Attach one of the 3-1/4 x 4-5/8″ pieces of cardstock. Now you may be asking, “Why did you pick such a strange size? Do I really have to cut 5/8”? Are you evil? Lol! pull me card image 7 Of course I’m evil! Lol! Actually I’m NOT trying to be evil, it’s just the size needed to fit right! Here’s a quick refresher (cheat sheet) to give you a hand! pull me card image 8 pull me card image 9 Ok, now flip the card over and we are going to apply the adhesive in the same manner on the other side. pull me card image 10 Glue the other piece of 3-1/4 x 4-5/8 cardstock to the strip. pull me card image 11 Carefully test your mechanism. When you pull down on one of the strips the other should pop up! Don’t let your plastic fall off of Section A! If it moves… AWESOME! Move on to the next step. pull me card image 12 If it doesn’t move… uh oh! Try and figure out what’s going wrong. Did you attach the cardstock strips to the right places on the plastic? Did you get adhesive somewhere it’s not supposed to be? You can do this! Play with it and it will work. Now. Grab a punch. I like using a 3/4″ circle punch. Fold the card in half, placing Section B FACING Section C. pull me card image 13 Cut a half circle notch from the bottom of Sections B and C AT THE SAME TIME. If you want it to be as close to the center as possible, and you do, you can measure half way and put a small mark there. (Half of 3-1/2″ is 1-3/4″) pull me card image 14 pull me card image 15 pull me card image 16 Re-fold the card, and attach Section D to the outside of the card. If your Section D piece hangs over the notch, you can just trim it a bit shorter. (This is NOT a big deal and happens often!) pull me card image 17 pull me card image 18 I like to cover the front and back with some decorative paper. This will help to prevent people from trying to pry open Section D! It also helps if you write PULL on the tab at the bottom. 🙂 Pull Me Surprise Card PHOTO TUTORIAL (Pull the tab at the bottom and a surprise pops out of the top too!) Enjoy your super-cool Pull Me Surprise! Card. Pull Me Surprise Card PHOTO TUTORIAL (Pull the tab at the bottom and a surprise pops out of the top too!) pull me card image 21   Pull Me Surprise Card PHOTO TUTORIAL (Pull the tab at the bottom and a surprise pops out of the top too!) If you create one of these I’d love to see it! Share your creation on the ScrapHappy Facebook page!

If you like creative ideas for scrapbooking you should check out this post:  HOW TO ADD VIDEO TO A SCRAPBOOK PAGE.

For more great tips, tricks and techniques to help you create scrapbooks you love sign up for emails HERE.

Let your creativity shine!

Alice Digital Signature 2013
{ 2 comments }

How to Cut a Page Protector {Video}

VIDEO! How to cut a page protector for interactive scrapbook layouts, like the Pull Me Surprise!Have you ever wanted to add an interactive element to your scrapbook page, but then were disappointed that you wouldn’t be able to access it when your page was in the protector?

I have a solution for you!

Welcome! If you’re here from True Scrap 6 I’m so happy to show you how to make your Pull Me Surprise layout work in a page protector. If you are not attending TS6 then, you’ll want to check it out, but hurry, the kick off pyjama party starts TONIGHT! Click here to view more details

In this video you’ll see a sneak peek at the project I’ll be teaching as a make and take at the pyjama party tonight. Shhh!

If you missed True Scrap 6 live, you can still get access to the fantastic classes. Click here for more details!

The free photo tutorial to make a card version of this is here: PULL ME SURPRISE CARD

My goal is to help scrapbookers make pages they love. If you want to fall in love with your scrapbooks again join the Scrapbook Wonderland mailing list!


Let your creativity shine!

Alice Digital Signature 2013
{ 4 comments }

5 Tips for Using Multiple Patterned Papers

5 Tips for Using Multiple Patterned papers on a Scrapbook Layout. https://scrapbookwonderland.com

5 Tips for Using Multiple Patterned papers on a Scrapbook Layout. https://scrapbookwonderland.comPatterned Papers 5 tips imageDo you have a collection of patterned papers? I know I do! Do you struggle to combine patterns? Do you avoid using your patterned paper?

Let’s take the intimidation out of combining patterns and get you comfortably using multiple patterns on your layouts!

Welcome to Scrapbook Wonderland! I’m Alice Boll the chief creator and director of fun and useful ideas here.

Here are 5 simple tips for using using multiple patterns on one page.

1. Use papers from one pack/kit/designer/line.

The easiest way to combine multiple patterned papers is to use pre-planned papers. When a designer creates a kit or a coordinated line of papers it is easy to use the patterns together on one page. Why recreate the wheel?

When you try to mix and match papers from different designs or packages it takes more work and more time to make sure the designs will go together. You have to worry about colours, shades, patterns and more.

Designers are paid to make sure the patterns work together. They use a matching palette of colours. Make it easy for yourself. Let the designers do the work and use a kit!
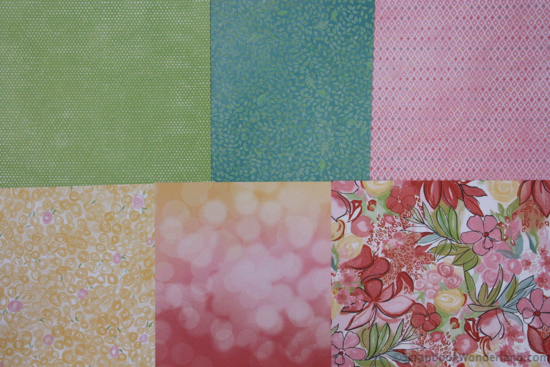
Brushed patterned paper from Close to My Heart. Using a kit makes combining patterns easy.

These papers are part of a kit called ‘Brushed’ from Close to My Heart. They are designed to coordinate together perfectly.

2. Find your patterned ‘neutral’.

One or more of the patterns you use should work as a neutral paper. This is the paper you’ll go to for matting, journaling or titles.

It’s also good to break up two strong patterns using a neutral pattern.

In the example below I would use numbers 1, 2, 3 and 4 as possible neutrals.
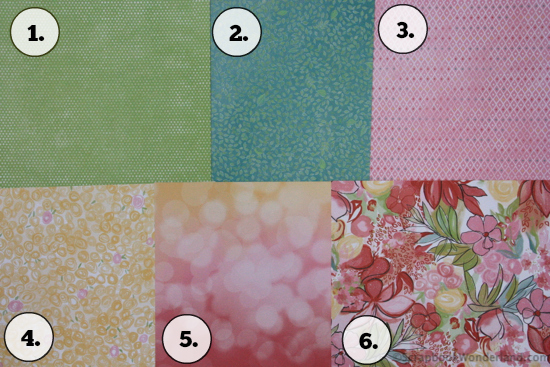
patterned paper picking

3. Choose your base.

The base of the layout can be a fairly busy pattern. You’ll want to consider what is being built on top of the base/background. If you have a busy base paper you’ll have to layer more neutrals on top.
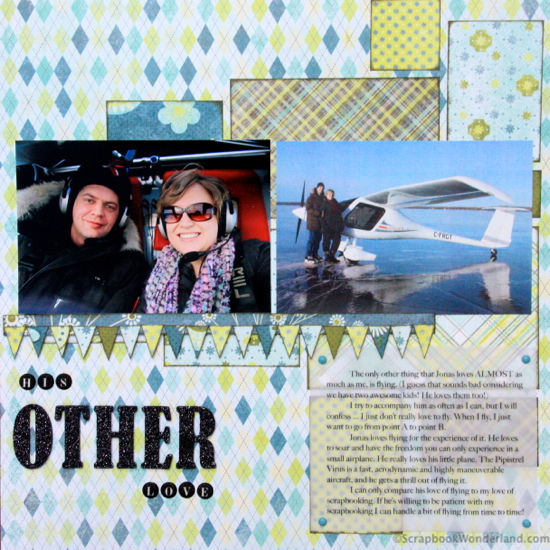
5 Tips for Using Multiple Patterned papers on a Scrapbook Layout. https://scrapbookwonderland.com

4. Layer.

Use patterns as layers on your page. Once you determine your base you can layer the other patterns.

If a pattern has a really overpowering design try to use it in small doses.

Remember to use a variety of colours and patterns to add variation to your page.
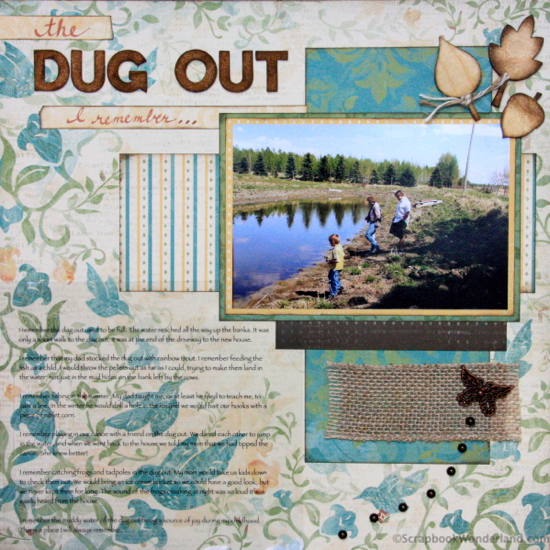
5 Tips for Using Multiple Patterned papers on a Scrapbook Layout. https://scrapbookwonderland.com

5. Allow each pattern a chance to shine.

Every pattern has a special attraction and adds character to your page.

Using different patterns you create a textured page with a lot of visual interest.

Be sure to give each pattern a chance to shine and show how beautiful it is!
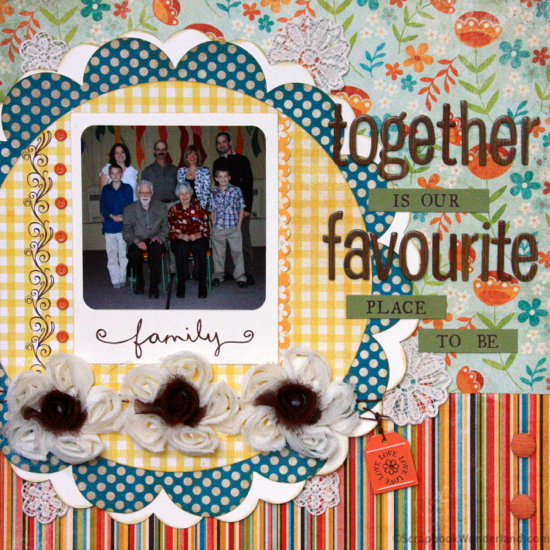
5 Tips for Using Multiple Patterned papers on a Scrapbook Layout. https://scrapbookwonderland.com

I hope I’ve inspired you to use your patterned paper! It shouldn’t be intimidating if you follow these 5  simple steps for using multiple patterns on a layout.

If you are finally ready to share the story of your life try Scrapbook YOU! In this class you can use these 5 patterned paper tips to help you create an album all about yourself! Click here to finally tell your story.

If you feel overwhelmed by embellishments and I’ve shared 3 Tips for Easy Scrapbook Embellishment in THIS POST.

Would you like even MORE tips to put your patterned paper to work? Try THIS POST.

Be sure to check out the next stop on the Make It Monday Blog Hop where Alison from Alison Day Designs is sharing how she turned an inspiration prompt into a Fall-themed decoration perfect for her Canadian Thanksgiving. Click HERE TO HOP.

Thanks for visiting. I’d love to hear your tips for using multiple patterns. Please leave your tips in the comments!

Alice.
Alice Digital Signature 2013

Are you following Scrapbook Wonderland on Facebook, Twitter or Pinterest?

Need some help when organizing your stamps?

Click on this image for my best tips and tricks, so you can find the stamps you want to use when you actually need them!
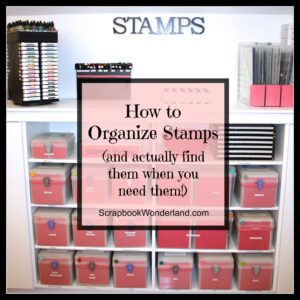
How to Organize Stamps and find them when you actually want to use them!
{ 21 comments }