≡ Menu

WonderFALL Scrapbook Layout and Tutorial

Simple and easy fall scrapbook layout featuring a horizontal and vertical photo.

Make it Monday blog hop imageIn this post I’m sharing a simple and elegant scrapbook layout featuring the colours of fall. Don’t miss the photo tutorial later in this post for creating softly crinkled die cut letters that will bring the feel of fall leaves to your scrapbook page.

If you are joining us from the Make it Monday blog hop you’ve hopped over here from Jen Wright’s where she shared a gorgeous template. I’ll share the next stop at the end of this post.

Fall is the only season that I scrapbook just for the sake of creating a beautiful page. Our spring is very short here, in Alberta, Canada, and it’s hard to tell that it’s even happening until it’s already over. Summer is filled with so many activities and winter is long and cold so Fall has a special place in my heart.

WonderFall Scrapbook Layout:
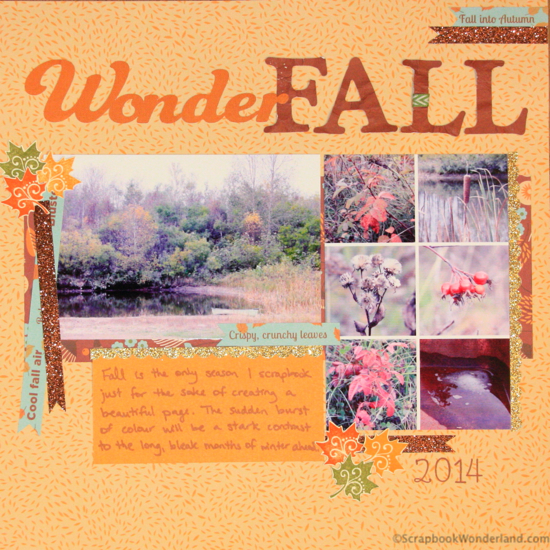
Create a WonderFALL layout and don't miss the photo tutorial for creating softly crinkled die cuts!

The design layout for this page was based from a sketch on the  Scrap Happy website. I thought it was an interesting layout because it featured both a horizontal and a vertical photo. I played with the design a bit so I could add mini photos instead of a single vertical photo.

Details:
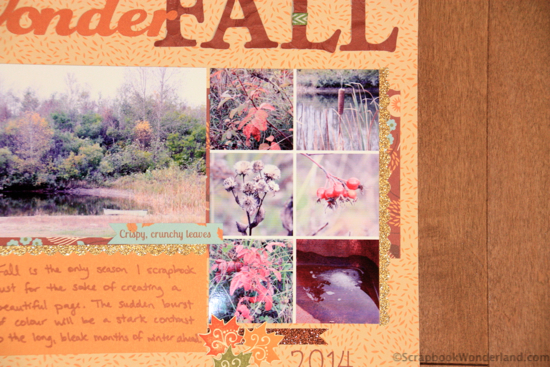
WonderFall image2

The vertical photo space is a collage of mini photos I created using a free online website called PicMonkey. If you are not ready to learn Photoshop you might want to give PicMonkey a try. You can add text to photos, do some editing and play with creative design.
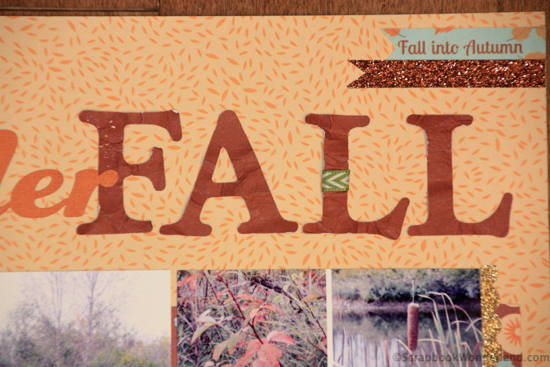
WonderFall image1

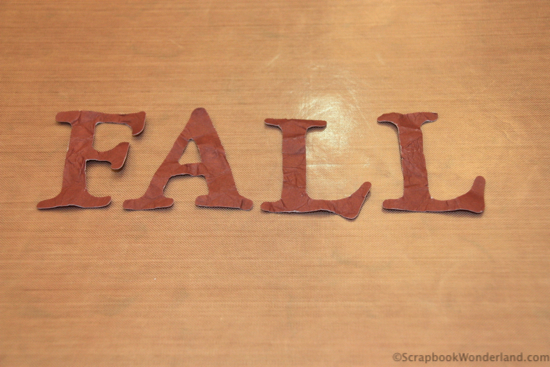
The word FALL was textured to mimic crinkly fall leaves. Want to give this technique a try?

Quick 5 step photo tutorial to make letters soft and crinkly:
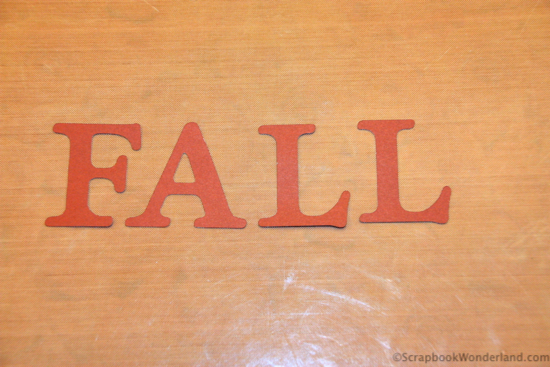
WonderFall image3

1. Cut out some die cut letters. These were created with a Cricut machine but any die cut machine will work.
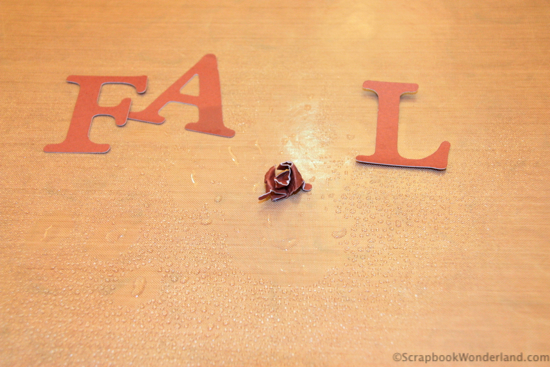
WonderFall image4

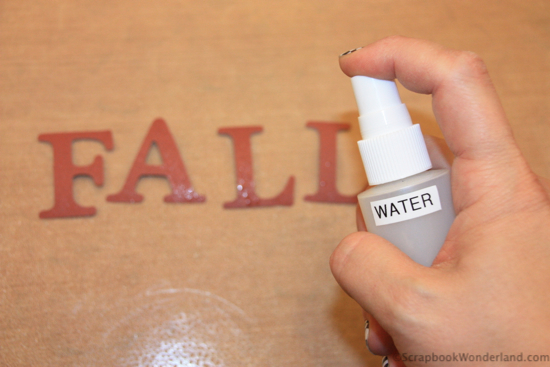
2. Spray the letters generously with water.

WonderFall image5

3. Gently squish up the letters being careful not to rip them. The water will make the paper more pliable.

WonderFall image6

4. Carefully lay the letters out flat to dry.

WonderFall image7

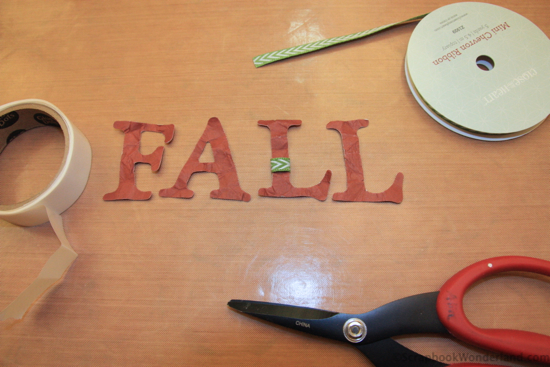
5. Embellish the letters further with a wrap of ribbon if you like. You can also ink them!

Your next stop on the Make it Monday blog hop is to Messtaken Identity where GinaZee has a school-themed tag that will be perfect for teacher gifts! Hop HERE.

I invite you to sign up for the Scrapbook Wonderland mailing list where you’ll receive even more useful tips and tricks for creating scrapbook pages you love. Sign up HERE.

Let your creativity shine!
Alice Digital Signature 2013


P.S. Want to attend THE MOST AMAZING scrapbooking live event? Click here to view more details
{ 20 comments }

Create A Scrapbook Gallery Display Wall

Create a scrapbook gallery to display your layouts and share them with family.

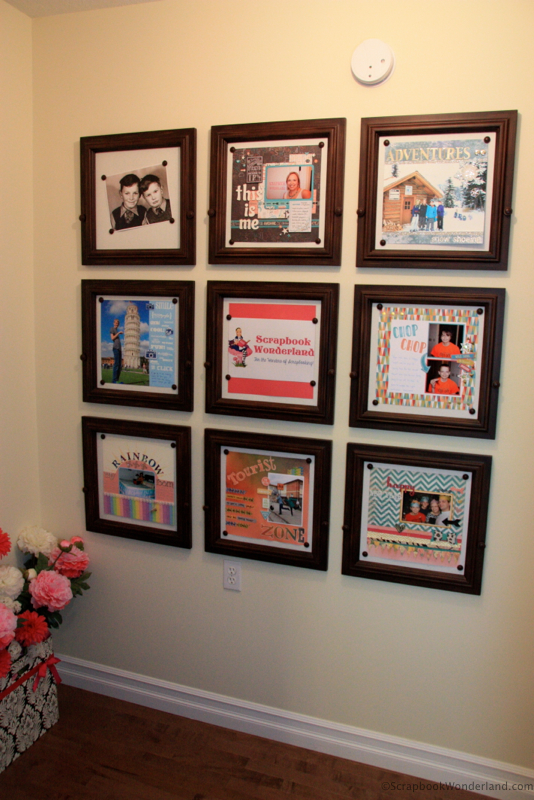
As a scrapbooker I want to be able to share my layouts with my family, but I find that my family members don’t grab the albums and snoop through them very often. I found a way to share my latest and greatest scrapbook layouts with my friends and family and create a great display wall all at the same time.

Create a scrapbook gallery to display your layouts and share them with family.

The 9 frames that I use are slightly larger than a scrapbook page and they have a magnetic surface covered in a linen fabric. I can easily pop a new layout up on the wall for my family and friends to see by using magnets! When I have something else to display I pop one of my older layouts into the album it belongs in.

Benefits of a gallery wall:

  • Share new layouts without picking up a whole album.
  • Gives my family a chance to see what I’m doing.
  • It is a great way to decorate my house with custom artwork.
  • Use the gallery to post special photos before you are ready to scrap them.
  • Enjoy your finished layouts more when you get to see them more often!

 Recommendation:

I love the magnetic frames because it is so easy to slip new layouts into the frames. I had shadow box frames before but I never changed them out because it was too much work. These ones are from Creative Memories but I’m sure I’ve seen similar frames online and I know I’ve seen how-to’s on Pinterest! Here’s a link to a pin on the Scrapbook Wonderland ‘scrapbook organization’ pin board.

If you are ready to fall in love with scrapbooking and create scrapbooks you love you can sign up for the Scrapbook Wonderland email list to get more inspiration like this HERE.

Have a wonderfully creative day!

Alice Digital Signature 2013


{ 9 comments }

True Scrap 6 Online Scrapbooking Event

Lain Ehmann True Scrap 6 imageI love scrapbooking. It makes my heart sing with joy when I’m creating and playing and sharing my stories.

But I’ll be honest. Sometimes I don’t scrapbook enough.

I get bogged down in the tedium of daily life.

I need to be inspired to get scrapping again.

I have the perfect solution to this problem!

True Scrap 6.

True Scrap is an online, live scrapbooking event hosted by Lain Ehmann.

Lain is a huge inspiration to me. She shows scrappers how to make scrapbooking fast and easy. She has a ton of energy and has the kind of resume that makes people go weak in the knees in awe.

  • She graduated from Stanford University.
  • She wrote for Simple Scrapbooks Magazine.
  • She runs a very successful online business, Layoutaday.com.

Why do you want to know all of this about Lain? Lain knows how to make things happen and she knows how to do it right. Luckily for us, she’s hosting True Scrap 6, the only online, live paper crafting event!

October 17 and 18th, 2014

Mark your calendar NOW!

You’ll be amazed when you see the line up of top notch instructors that will be there at this event.

  • Noell Hyman
  • Jennifer Gallacher
  • Nichol Magouirk
  • and more!

And you can be there too.

You can even come in your pyjamas.

It’s online. You interact live with other attendees and have the opportunity to ask the instructors questions about their classes.

I know how valuable True Scrap has been to me, I still refer back to the classes (you get eternal access) so I can review exactly what the instructors have done.

Being an online event it’s like having a front row seat in every class too! You’re never stuck in the back sitting behind the woman who had to wear her hair in a 3 foot beehive.

I even have a coupon code for you. Save $20 with the code HERO until October 10.

Click here to view more details *affiliate link
I have one more exciting thing to share!

I’ll be there. I’m already registered as an attendee, but there’s more…

I’ll be teaching a super-fabulous make and take!

You’ll love it! I’ve taught this special technique in a live event and everyone goes, “Wow!” so I knew it was what I had to share at True Scrap!

Click here to register for True Scrap 6. (Don’t forget to use the code HERO to save $20!) *affiliate link

I truly hope you’ll come and see what it’s all about.

Let your creativity shine!

Alice Digital Signature 2013


P.S. A note about affiliate links. From time to time I will share a product or opportunity with you that would allow me to receive an affiliate commission. I would never do this unless it is a product that I have had the pleasure of using and have been over-the-moon excited about. I hope you will be too.

{ 2 comments }

How to Use Custom Created Art on a Scrapbook Layout

You’ve made some custom art, now what?

If you’ve been having some fun playing with artistic techniques you’re probably thinking, “This is great! Now how do I use it on a scrapbook layout?”. I have 3 inspiring ways to incorporate your artwork into your layouts, but first…

Make it Monday blog hop imageIf you’re hopping along the Make it Monday hop you probably ended up here from Alison Day Designs where Alison was taking layouts from “meh” to marvelous with frames! I’ll share the next stop on the hop at the end of this post.

Ok, let’s get your art onto a layout! Here’s 3 inspiring ways to incorporate your artwork into your layouts.

Add a Quote:

Use your artwork as a backdrop for a quote. There’s two ways you may wish to try this.

  1. Add text directly on to your artwork.
  2. Layer digital text over an image of your art.

It’s up to you to decide which method you prefer.

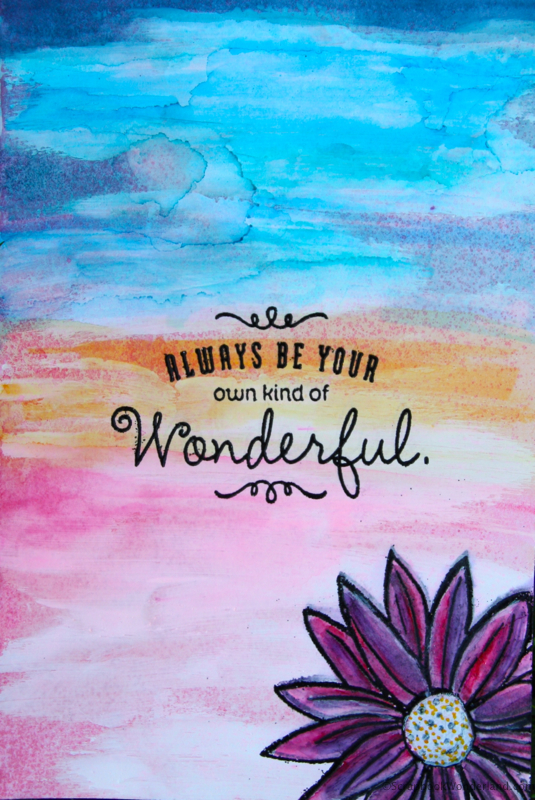
Always be your own kind of wonderful. Quote on custom art background by Alice Boll of http://ScrapbookWonderland.com

This quote is embossed directly onto the custom created alcohol ink art.

Journaling Tip! Quotes are a great way to add emotion or sentiment to a page without having to come up with the perfect words yourself.

P.S. Want to learn how to create art like this? See THIS POST for a photo tutorial.

Create an Embellishment:

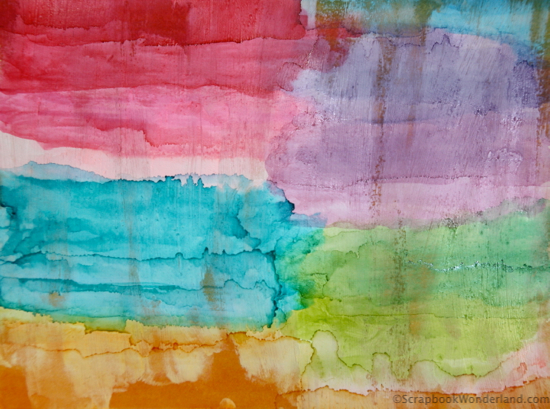
Alcohol ink art created by Alice Boll of https://scrapbookwonderland.com

This alcohol ink art will become a custom embellishment.

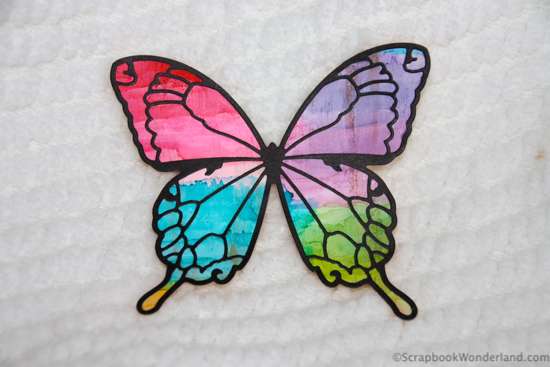
Alcohol ink butterfly cut with memory box Tristan and Chloe dies. Created by Alice Boll of https://scrapbookwonderland.com

This butterfly was die cut from a piece of alcohol ink art and will be an embellishment on a scrapbook page.

Create a Custom Background:

Your artwork can be the perfect backdrop to tell your stories and share your photos.

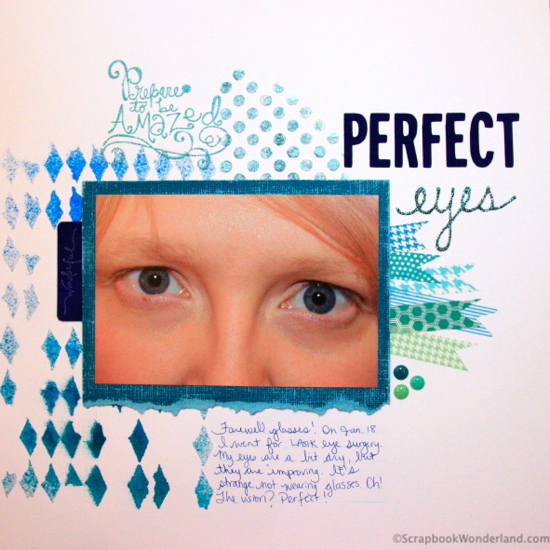
Perfect Eyes Layout created by Alice Boll of https://scrapbookwonderland.com

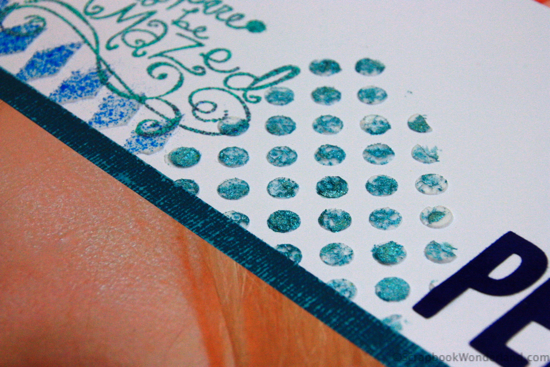
You can add texture and dimension  to your layout using art techniques.

Perfect eyes layout image2

By using your custom art you can be sure you have the right colours and tone for the story you are sharing on your layout.

Perfect eyes layout image3

Recap:

3 Simple Ways to Use Your Art on a Scrapbook Layout

  1. Add a Quote
  2. Create an Embellishment
  3. Create a Custom Background

I hope you’ll be inspired to use your custom art on a scrapbook layout. I’d love to see what you’re creating! Share photos on the Scrapbook Wonderland Facebook page HERE.

If you are new to Scrapbook Wonderland I’ve gathered up some of my best info for you all in one place. Visit this post for links to my top posts so you can start making scrapbooks you love today! START HERE.

Hop over to Scrapping Wonders  for the next stop on the Make it Monday Hop and create labels with Beth for your Project Life albums!

Let your creativity shine!

Alice Digital Signature 2013


{ 11 comments }

Creating Art Using Alcohol Markers: Photo Tutorial

How to make beautiful art easily with alcohol ink markers.Make it Monday blog hop imageAre you curious about alcohol ink markers but you’re not quite sure where to get started? There’s so many fun ways to use them! But first…

Welcome! If you are participating in the Make it Monday Blog Hop then you’ve arrived from UseYourStash.com and Margareta has inspired you to use Project Life cards in new ways. I’ll share links to the rest of the stops along the hop at the end of this post so you won’t miss out!

Alcohol markers are very popular in the world of scrapbooking these days. In this post I’ll show you a simple art technique using alcohol markers that doesn’t require many supplies or artistic ability. This is a fun and easy way to play with your markers and make some art!

Let’s get started with this 5 step photo tutorial.

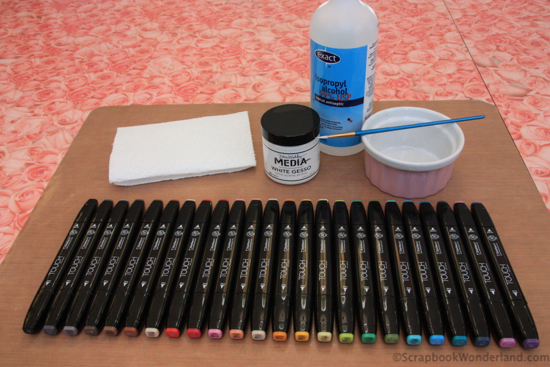
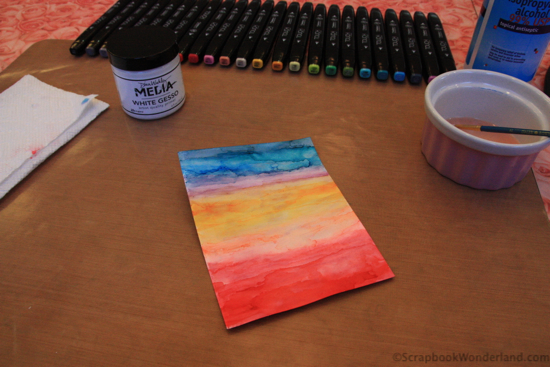
Step 1: Gather supplies

  • White Gesso
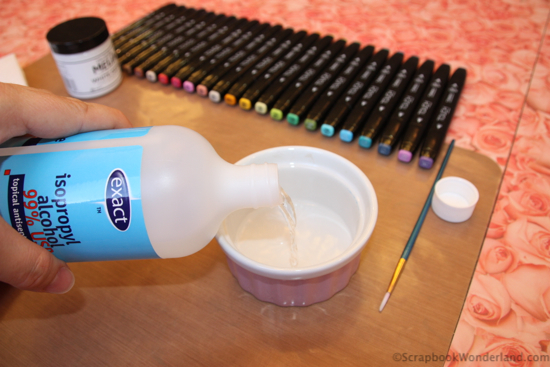
  • Alcohol
  • Brush
  • Markers
  • Paper towels for clean up and blotting
  • Markers
alcohol marker art image1

Bonus tip: I create on a craft mat. It is easy to wipe down and clean up!

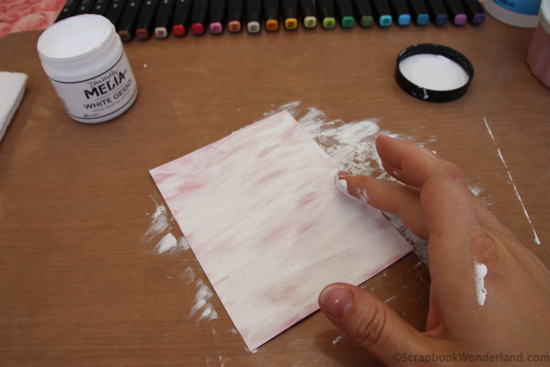
Step 2: Coat paper with gesso.

This creates a layer that prevents the ink from bleeding through the paper. Allow to dry.

Less gesso = more bleed through

More gesso = less bleed through

There’s no wrong amount to coat the paper, it all depends on how you want your project to turn out. Alcohol inks don’t blend well on regular cardstock so this layer of gesso will allow your inks to blend together. Be sure your gesso is dry before the next step.

alcohol marker art image2

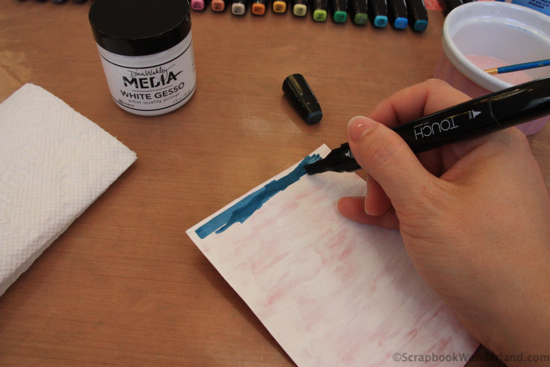
Step 3: Begin colouring with alcohol marker.

I’m using the ShinHan art markers available from Close to My Heart. (link for Canadians only, sorry!)

The colouring does not have to be precise or perfect. You are going to blend this ink! Your goal is to simply add ink to the paper.

alcohol marker art image4

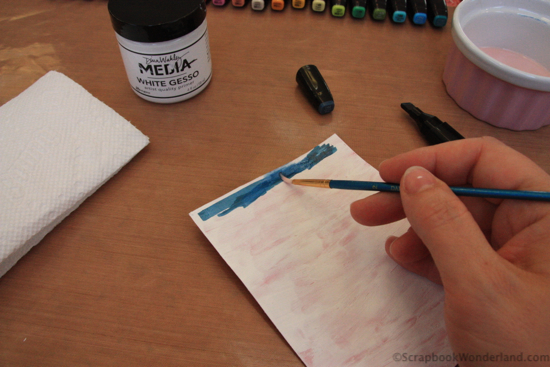
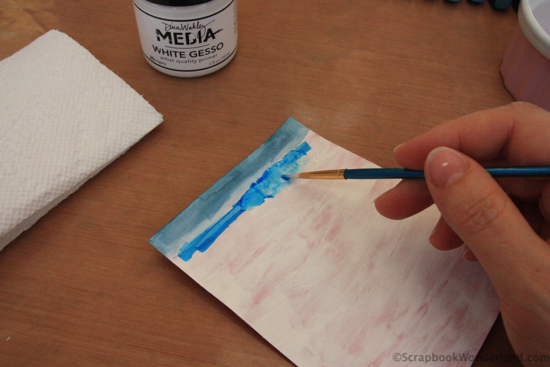
Step 4: Blend with alcohol using the paint brush.

This part is the fun part! You will begin to see the colours mixing together and softening. Dab your paintbrush in the alcohol and start blending the ink that you coloured with your marker.

When you want more vibrant colours just add more ink by colouring with your marker. (Allow the alcohol to dry for a moment before adding the ink.)

When you want to remove ink just blot excess onto paper towel and clean your brush in the alcohol.

alcohol marker art image3 alcohol marker art image5

Repeat with more colours or shades and feel free to blend the colours into each other. There is no ‘right’ or ‘wrong’ way to do this. Experiment on smaller projects so that you get the knack for it and then you’ll be comfortable to tackle a larger project.

alcohol marker art image7

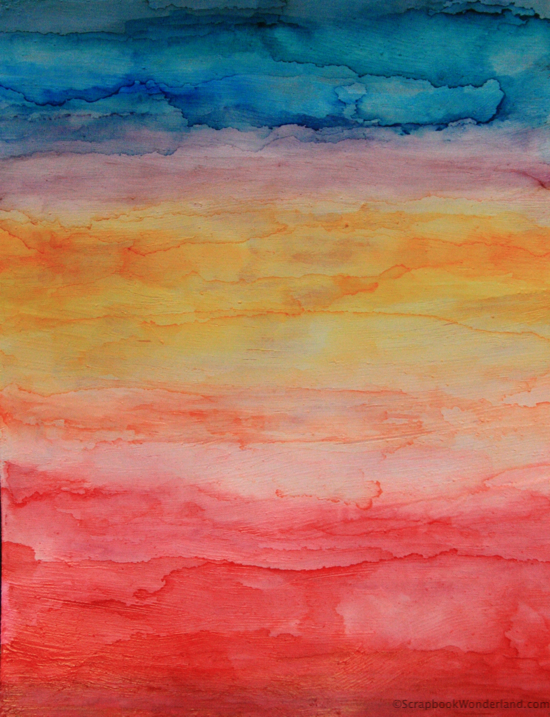
Step 5: Enjoy your art!

alcohol marker art image8


alcohol marker art image9I hope you’ll be inspired to try more creative art techniques for your scrapbooks, cards and art journals. In an upcoming post I’ll be showing ways you can put this art to use in your scrapbooks and craft projects.

If you liked this art technique you may want to see this post about art journaling HERE.

If you have any questions I’ll be happy to answer them in the comments! I read and respond to all comments as quickly as possible as I appreciate your interest.

It’s time to start hopping again! Visit DigitalScrapbookingHQ.com to be inspired by the bright and cheerful layout Melissa created using her front facing camera.

Let your creativity shine!

Alice.

Alice Digital Signature 2013


 BLOG HOP LIST:

Clicky Chick Creates – make tags with Connie

Use Your Stash – PL cards in new ways with Margareta 

Scrapbook Wonderland – Alice is our guide to creating art with alcohol markers <— You are here!

Digital Scrapbooking HQ – Melissa is giving us a tutorial for a digi layot

Scrapping Wonders – Beth is showing how to make a mini album from one sheet of paper

Photos Kept Alive – Karen is inspiring us to make a road trip album

{ 7 comments }