
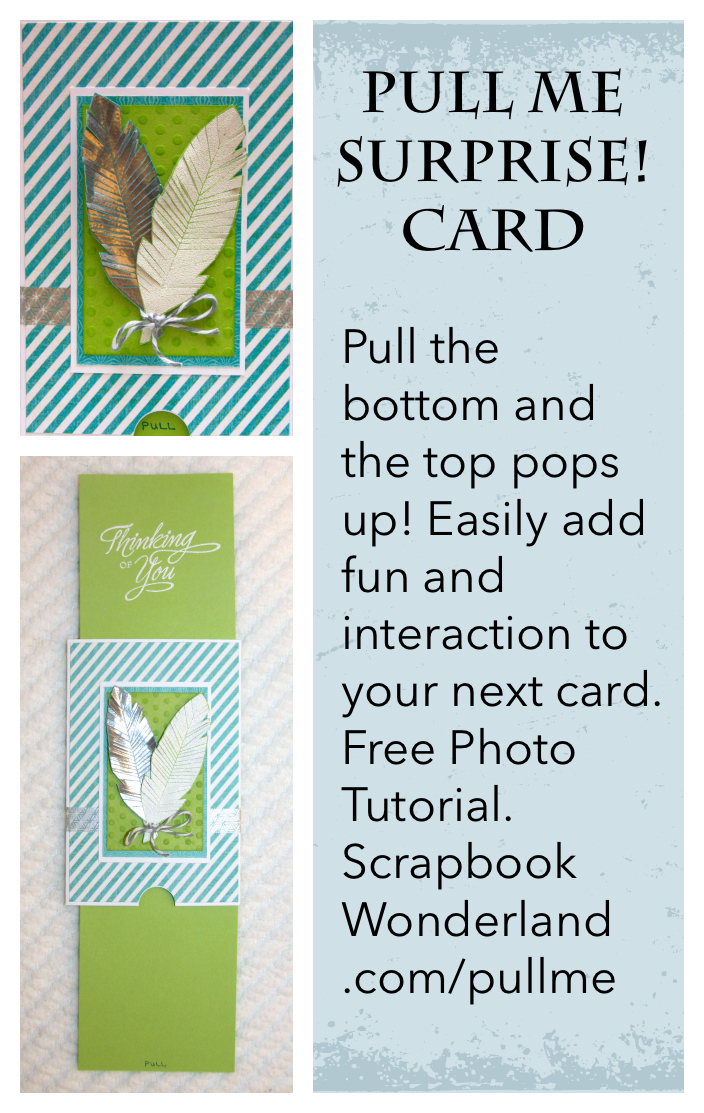
 If you are like me, you are going to love this technique for a fun and surprising card! I call it the PULL ME SURPRISE!
When you pull the tab at the bottom of the card not only does a hidden piece slide down but another piece pops out the top! Super-fun! 🙂
Let’s get started! (Don’t forget to bookmark this page so you can come back and make this card again.)
Supplies:
- 1 Piece of Cardstock: 5-1/2 x 12″
- 2 Pieces of Cardstock: 3-1/4 x 4-5/8″
- Plastic bag
- Adhesive: Sticky strip or other strong adhesive
- Materials to decorate your card
- NOTE: All supplies used in this sample are from Close to My Heart.
Directions:
Score the 12″ piece of cardstock three times creating 4 sections A-D. A. Just under 3-1/2″ B. 3-1/2″ C. Just over 3-1/2″ D. You will have a section left at the end of just over 1 inch. Did you find yourself asking, “What’s ‘just under’ 3-1/2 inches mean? I generally use about 1/8” less, and more when making my score marks. Is that better? 😉 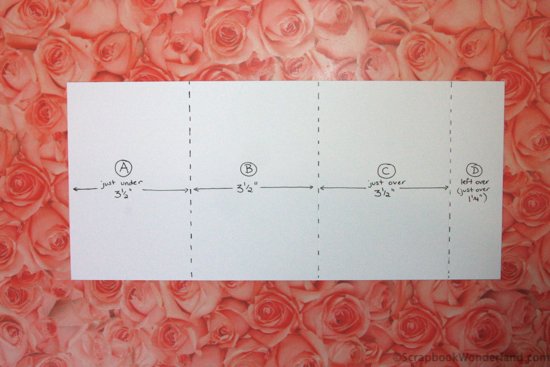 Cut 3/4″ off top and bottom of section A, just to the fold/score mark.
 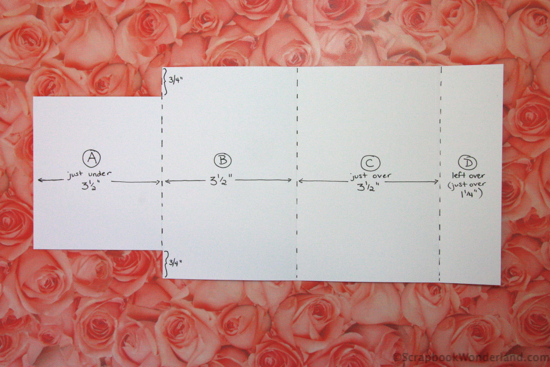 Use bone folder to crease fold lines. Cut a strip of plastic bag approximately 2-1/2 inches wide by 9″ long.
  Wrap the strip of plastic bag around section A and glue the plastic to itself. Be careful not to stick glue on anything other than the plastic!
 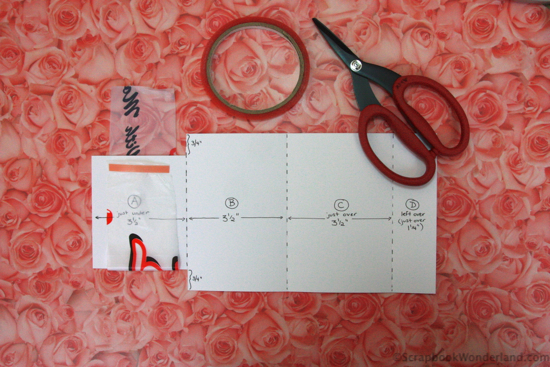 Trim off the excess plastic.
  Place more adhesive over top of the adhesive holding the plastic together.
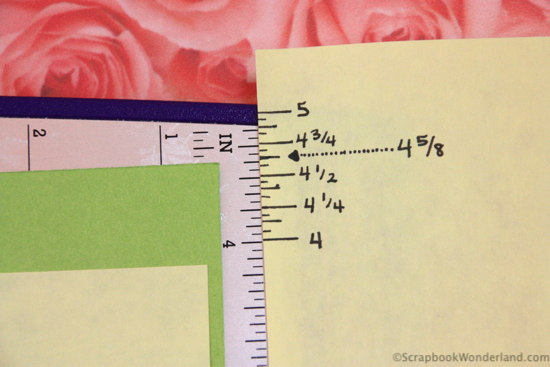
 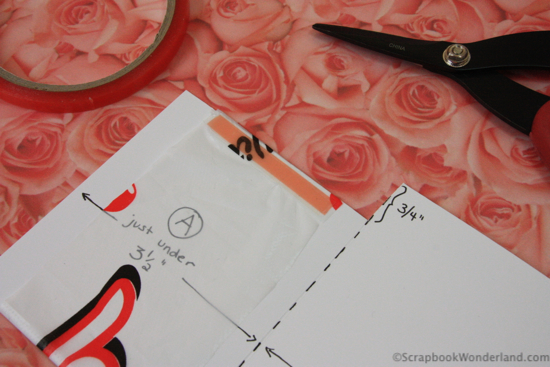 Attach one of the 3-1/4 x 4-5/8″ pieces of cardstock. Now you may be asking, “Why did you pick such a strange size? Do I really have to cut 5/8”? Are you evil? Lol!
  Of course I’m evil! Lol! Actually I’m NOT trying to be evil, it’s just the size needed to fit right! Here’s a quick refresher (cheat sheet) to give you a hand!
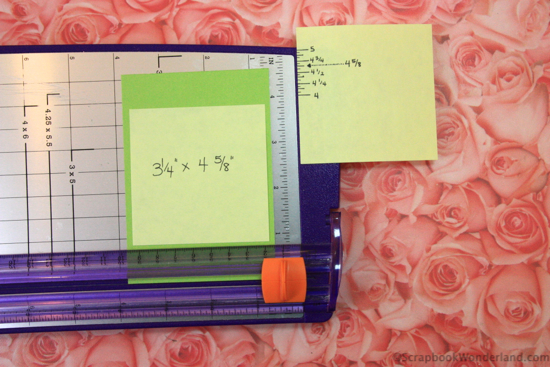
 Ok, now flip the card over and we are going to apply the adhesive in the same manner on the other side.
  Glue the other piece of 3-1/4 x 4-5/8 cardstock to the strip.
  Carefully test your mechanism. When you pull down on one of the strips the other should pop up! Don’t let your plastic fall off of Section A! If it moves… AWESOME! Move on to the next step.
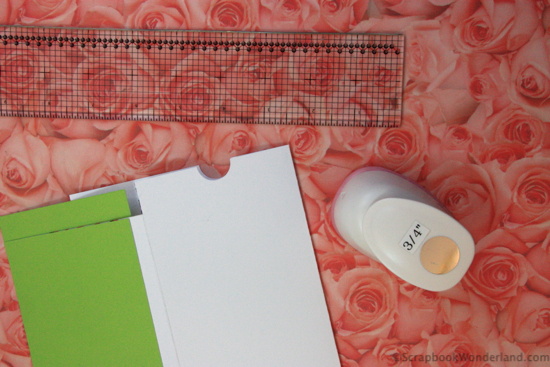
 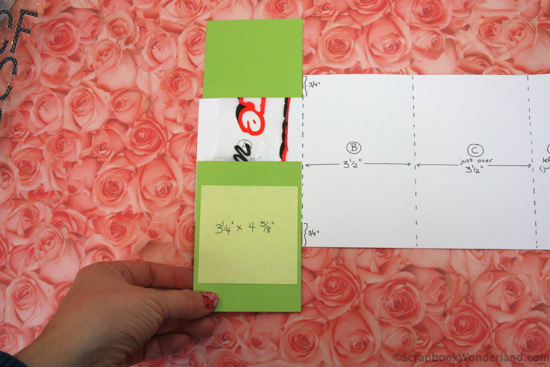 If it doesn’t move… uh oh! Try and figure out what’s going wrong. Did you attach the cardstock strips to the right places on the plastic? Did you get adhesive somewhere it’s not supposed to be? You can do this! Play with it and it will work. Now. Grab a punch. I like using a 3/4″ circle punch. Fold the card in half, placing Section B FACING Section C.
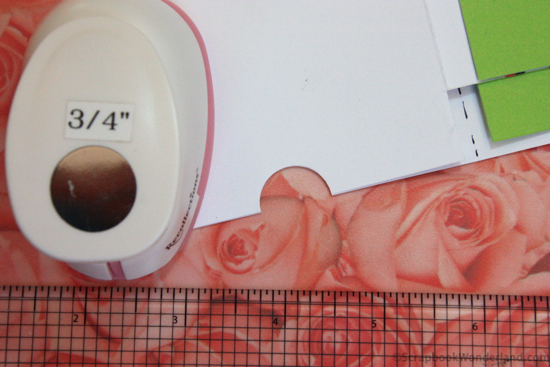
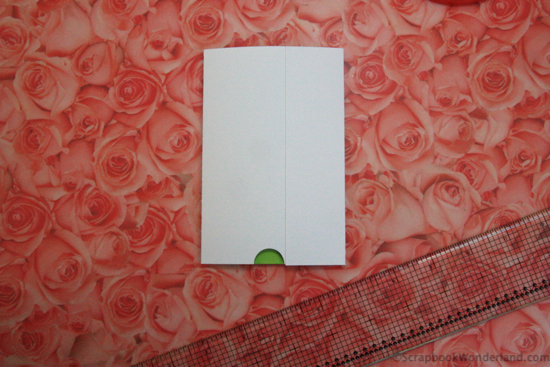
  Cut a half circle notch from the bottom of Sections B and C AT THE SAME TIME. If you want it to be as close to the center as possible, and you do, you can measure half way and put a small mark there. (Half of 3-1/2″ is 1-3/4″)
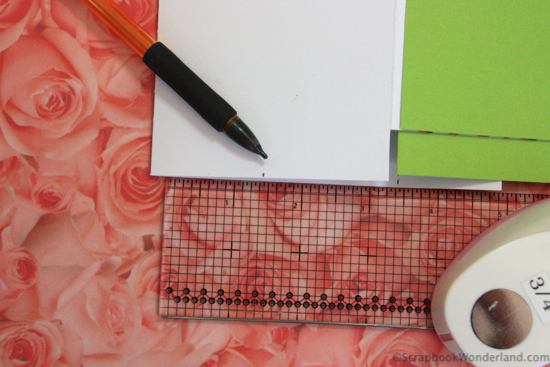
 Re-fold the card, and attach Section D to the outside of the card. If your Section D piece hangs over the notch, you can just trim it a bit shorter. (This is NOT a big deal and happens often!)
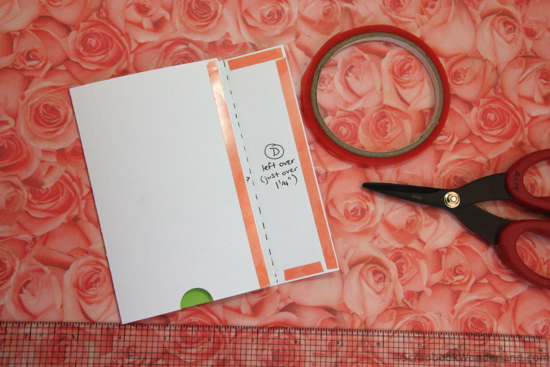
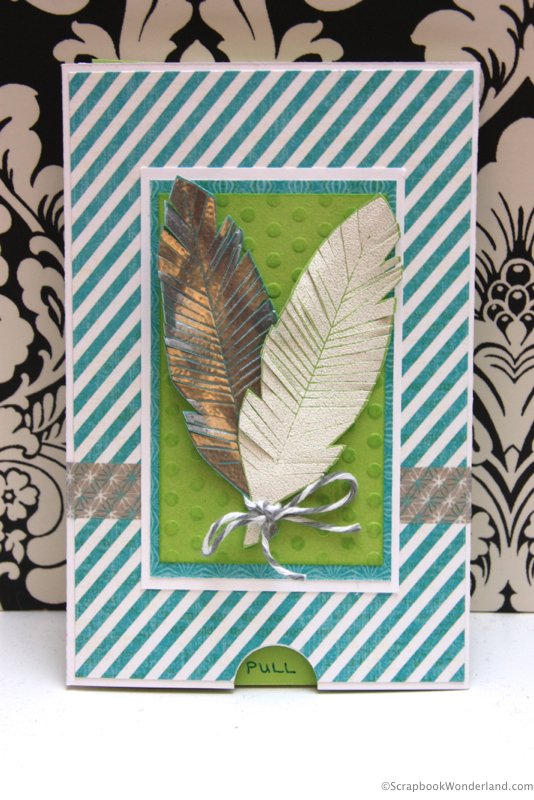
 I like to cover the front and back with some decorative paper. This will help to prevent people from trying to pry open Section D! It also helps if you write PULL on the tab at the bottom. 🙂
 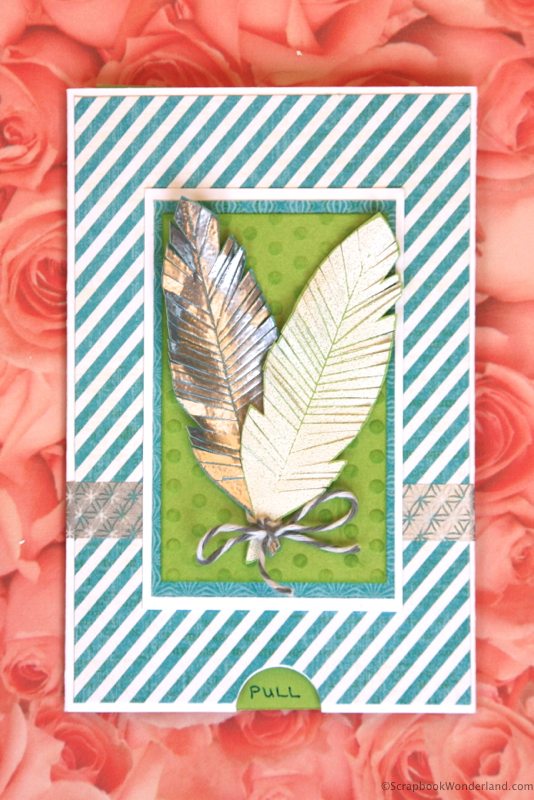 Enjoy your super-cool Pull Me Surprise! Card.
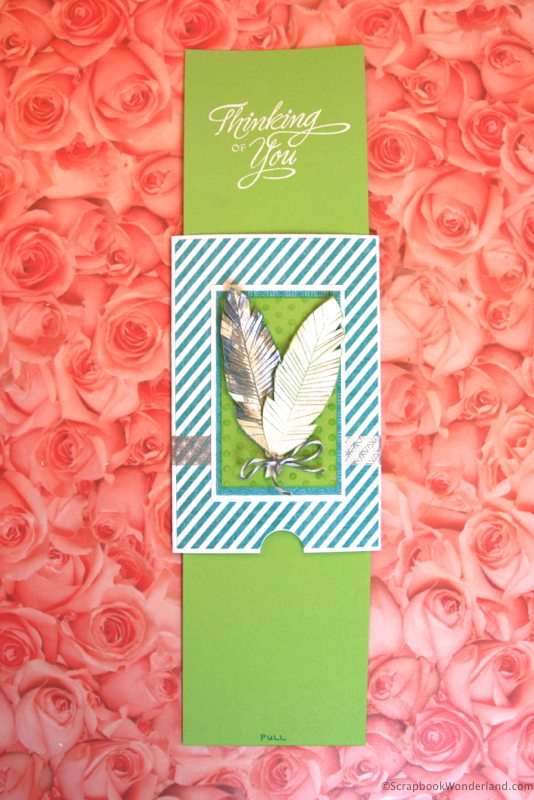

 If you create one of these I’d love to see it! Share your creation on the ScrapHappy Facebook page!
If you like creative ideas for scrapbooking you should check out this post: HOW TO ADD VIDEO TO A SCRAPBOOK PAGE.
For more great tips, tricks and techniques to help you create scrapbooks you love sign up for emails HERE.
Let your creativity shine!


Comments on this entry are closed.